Building a blog with Create React App and headless Oracle Content Management
May 14, 2021Create React App (CRA) is one of the most popular projects in the React ecosystem because of its ease of use for developers looking to get started quickly with a working React application off the shelf. Together with Oracle Content Management as a headless content management system (CMS) or distributed CMS, you can leverage Oracle Content Management as an API and data provider for your React application in a matter of minutes, especially if you’re leveraging Create React App.
The JavaScript and Jamstack ecosystems for Oracle Content Management as a headless CMS are rapidly expanding, with many new features and tools coming in just the past few months. Among these are a universal React blog boilerplate with server-side rendering (SSR), a first-class Gatsby source plugin for Oracle Content Management, and a client-side React blog boilerplate based on Create React App that works as a browser-ready single-page React application off the shelf.
In this tutorial, I walk through the setup and implementation of a React blog application that leverages Oracle Content Management as a headless CMS from start to finish, beginning with a standard CRA application as a foundation. In doing so, we’ll visit some of the exciting capabilities available in both CRA and Oracle Content Management, including a powerful Content SDK for requests and channel-differentiated publishing.
What we’re building
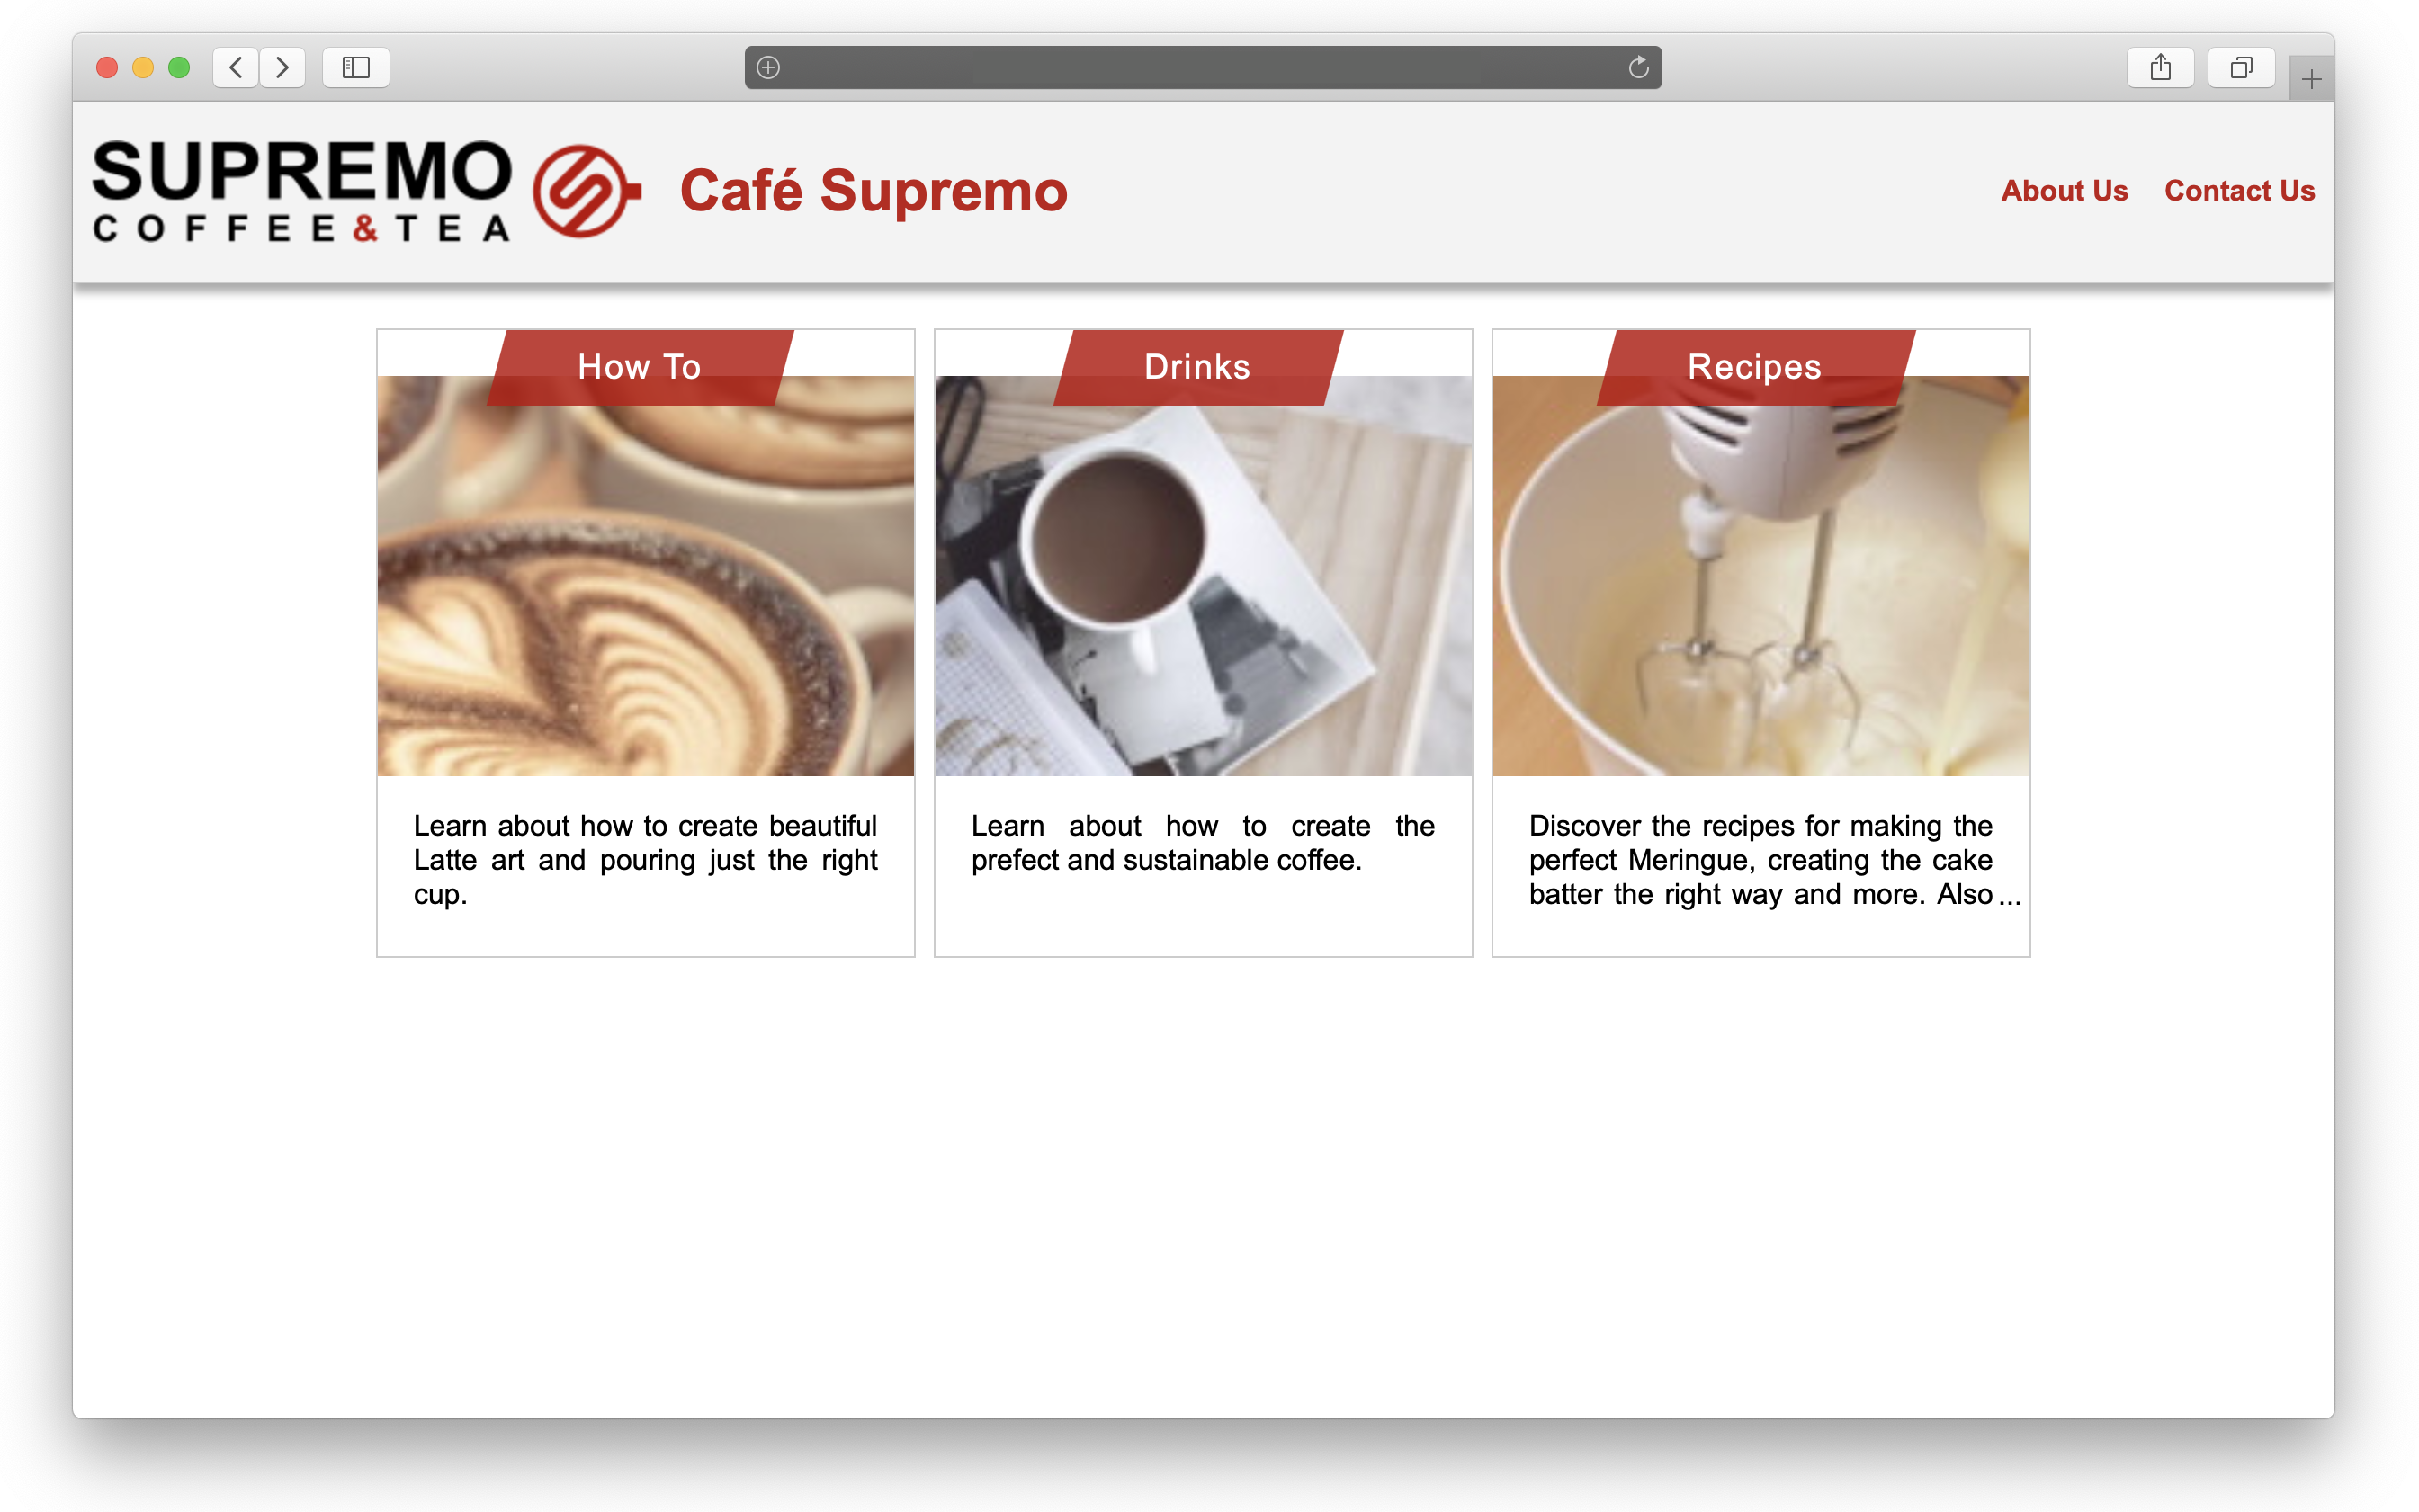
To take a look at what we’re building, here is the end state of our tutorial: a rudimentary React blog that utilizes Oracle Content Management’s Content SDK in JavaScript to consume content from Oracle Content Management as a headless CMS. Our blog will consist of a three-page site that lets visitors explore blog articles organized into topics.
The first page, the home page, will consist of branding (company name and logo), some links, and a list of blog topics that should be included on the page.
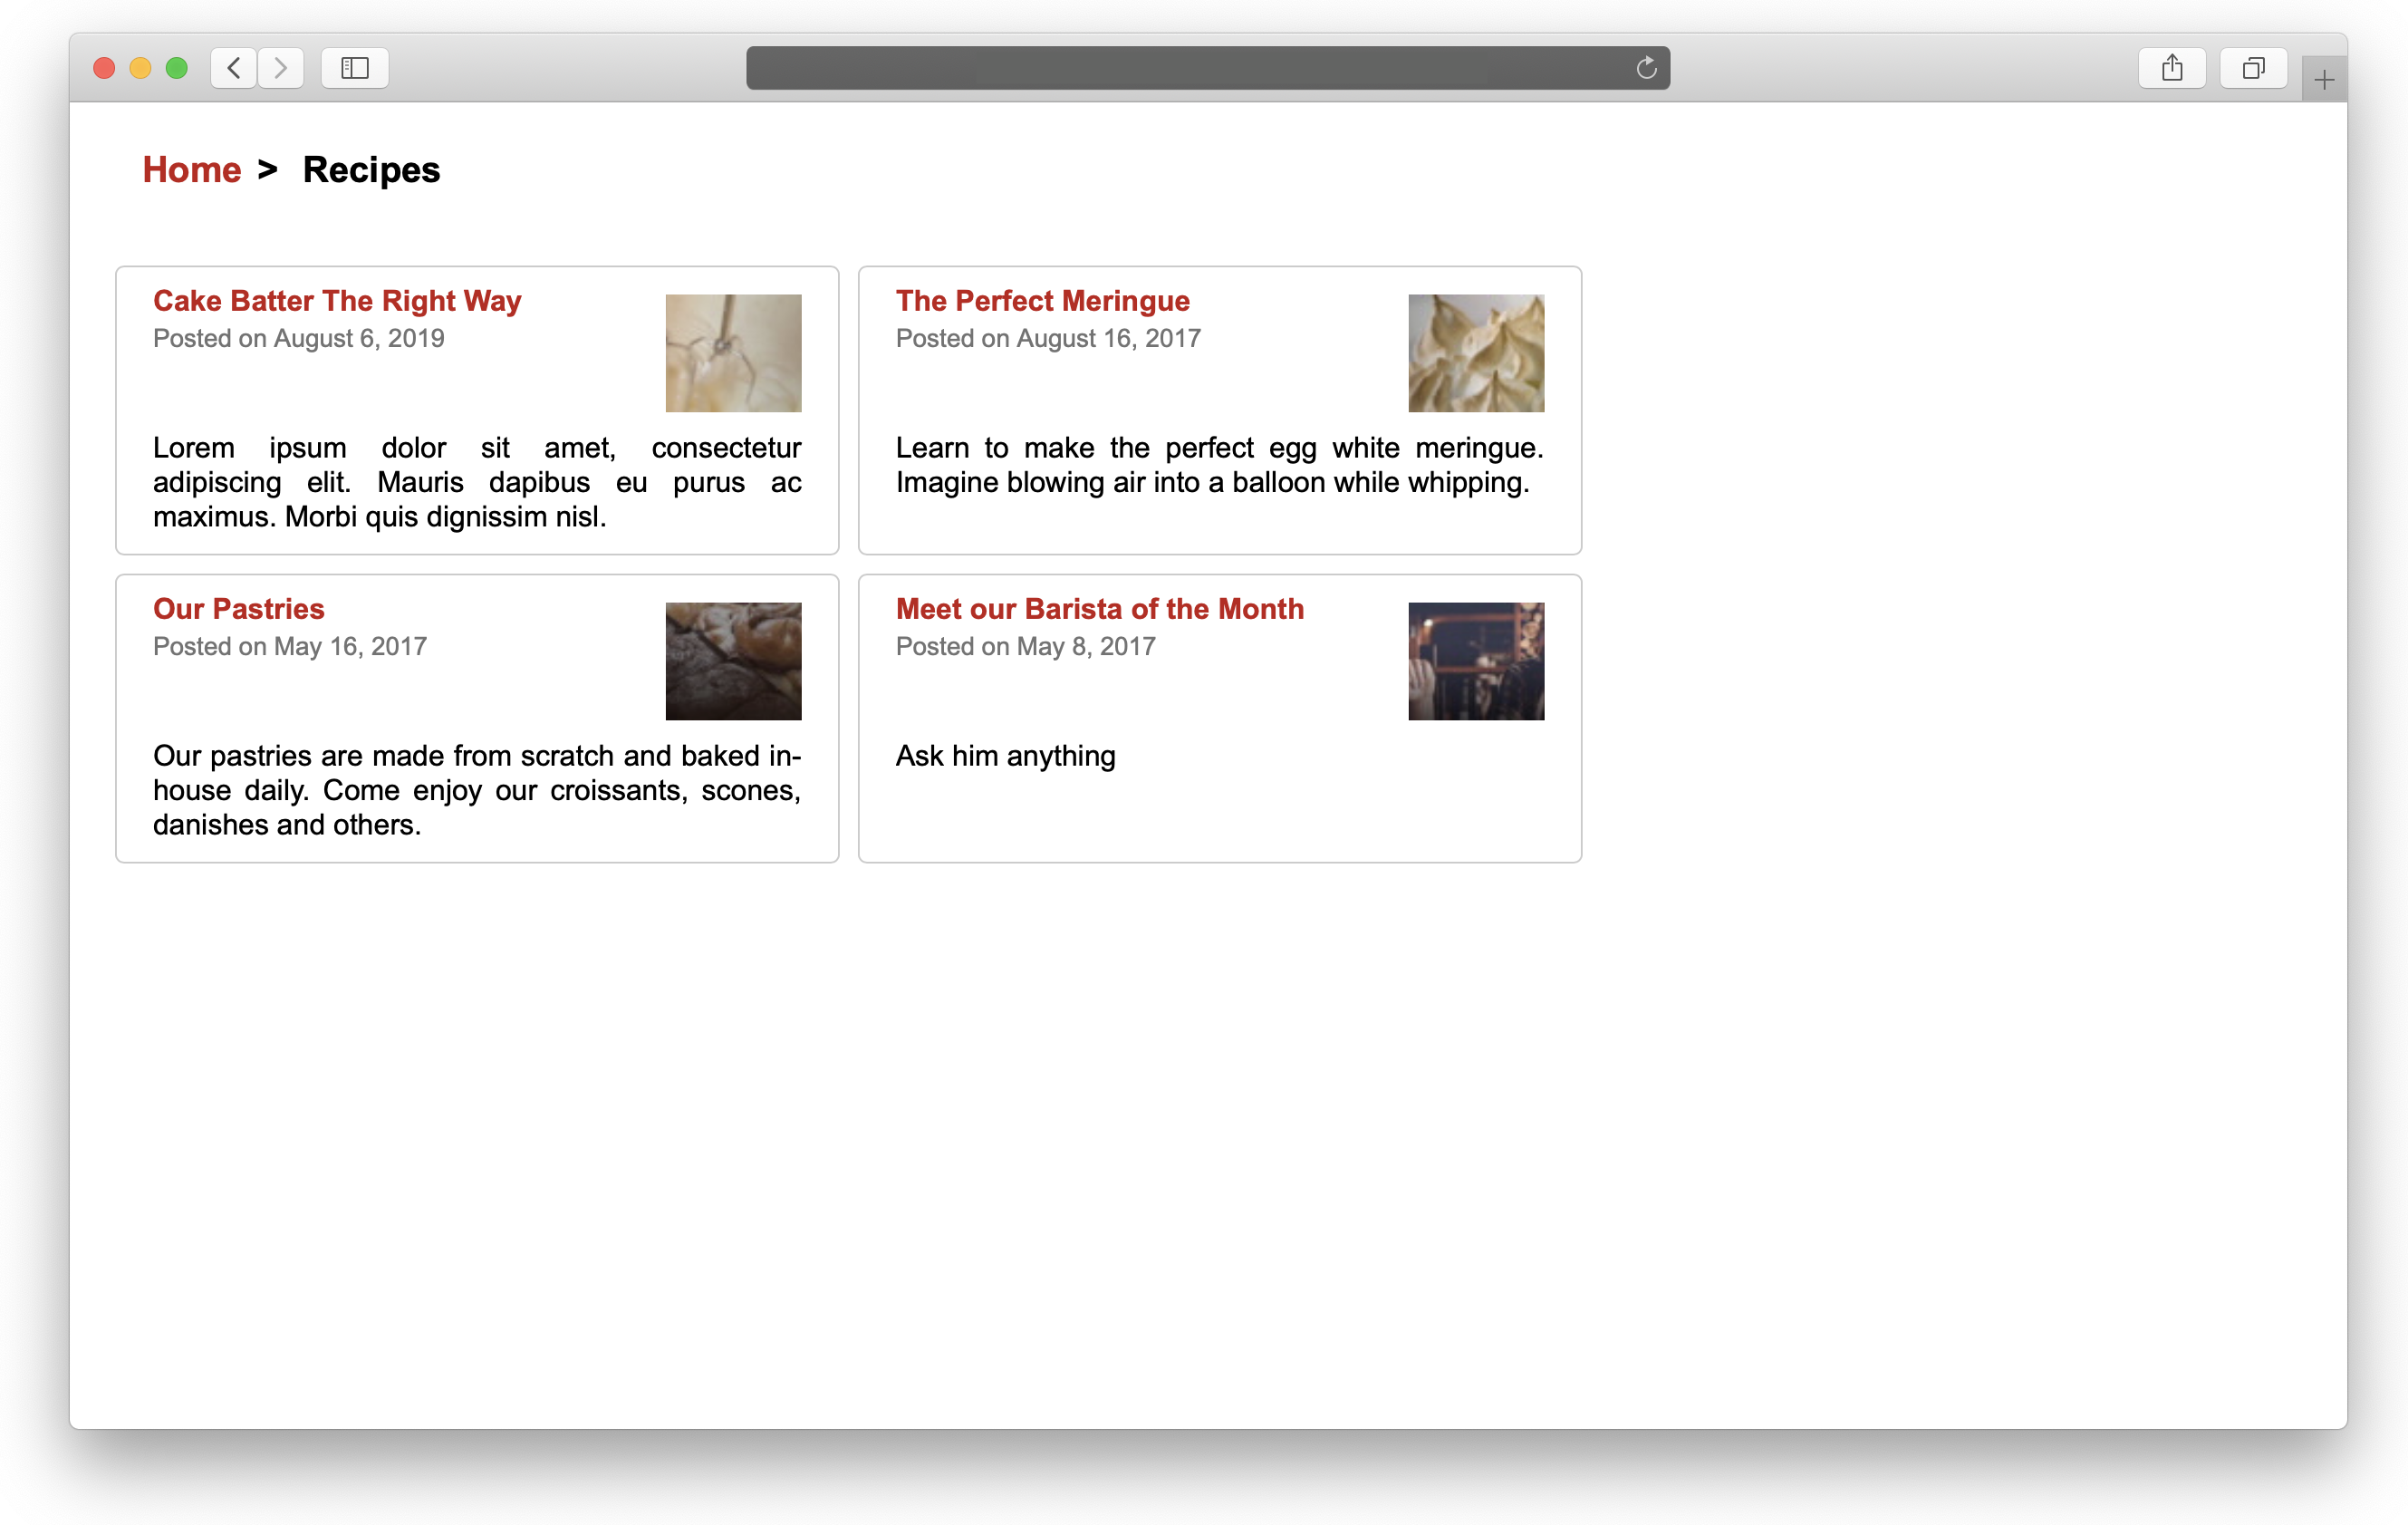
The second page, the topic page, will show previews of each blog article that belongs to the topic.
Lastly, the article page renders the final blog article, including information about the blog’s author.
Here’s a schematic of what we’re building that illustrates all of the components we’re putting together, showing how these components are nested within one another where relevant:

This walkthrough assumes your local development environment has Node.js version 10 or higher globally available.
Setting up our React application
Before we begin, be sure you have an operational instance of Oracle Content Management running that is configured to act as a headless CMS. For developers new to Oracle Content Management, I have a quickstart guide available to set up Oracle Content Management as a headless CMS. But you don’t need to set up an instance if you don’t want to right now; all of the steps in this walkthrough leverage a publicly available Oracle Content Management instance with boilerplate data built in.
To get a sense of what we’re building from the perspective of the code rather than the visual appearance of the application, you can see the
repository on GitHub, which represents a universal (i.e. both server-side and client-side) implementation of this blog application. You can also watch my tutorial video on YouTube that demonstrates how to leverage the oce-react-blog-sample
repository for your own universal React purposes.oce-react-blog-sample
Getting started with Create React App
First, let’s scaffold a new Create React App implementation. If you’ve never used CRA before, you can scaffold a new application by executing the following command (note
npxnpm$ npx create-react-app oce-react-blog-cra --template cra-template-pwa
$ cd oce-react-blog-cra
$ npm startThe
--template cra-template-pwaserviceWorker.jsThe
npm starthttps://localhost:3000npm run buildInside the
oce-react-blog-cramy-appoce-react-blog-cra
├── README.md
├── node_modules
├── package.json
├── .gitignore
├── public
│ ├── favicon.ico
│ ├── index.html
│ └── manifest.json
└── src
├── App.css
├── App.js
├── App.test.js
├── index.css
├── index.js
├── logo.svg
└── serviceWorker.js
└── setupTests.jsGreat! We now have a working application scaffolded on CRA. It’s time now to integrate this React application with Oracle Content Management as a headless CMS. As mentioned earlier, in this walkthrough we’ll use the publicly available Oracle Content Management instance already associated with all of our open-source samples, but you can also use my quickstart guide to create and manage your own instance.
Adding a router and routes
First, let’s remove certain files that we don’t need and replace them with a single
index.jsxsrc$ cd src
$ rm App.js App.test.js App.css index.css index.jsDon’t worry; we’ll add in CSS later, while the test JavaScript unfortunately won’t apply to our own React application (though you can create your own after we’re finished). Then, create a new file named
index.jsxsrc$ touch index.jsx
$ atom ../.First, let’s use
react-router-domBrowserRoutersrc/index.jsxreact-dom// src/index.jsx
import './styles.css';
import React from 'react';
import { render } from 'react-dom';
import { BrowserRouter as Router, Route, Switch } from 'react-router-dom';
import TopicsListContainer from './components/TopicsListContainer';
import ArticlesListContainer from './components/ArticlesListContainer';
import ArticleDetailsContainer from './components/ArticleDetailsContainer';
import NotFound from './components/NotFound';Next, immediately after these
importrender()In the process, we’ll provide routes that represent each of our main pages in the application: a home page (
//articles/:topicId/article/:articleIdArticlesListContainerArticleDetailsContainer// src/index.jsx, continued
render(
(
<Router basename="/samples/oce-reactcsr-blog-sample">
<Switch>
<Route exact path="/" component={TopicsListContainer} />
<Route
exact
path="/articles/:topicId"
render={(props) => {
// LIST OF ARTICLES FOR A TOPIC
// URL FORMAT : /articles/topicId?topicName=name
//
// Called from:
// - "TopicListItem" : user has clicked on a topic in the topic listing
// - "ArticleDetails"/"Breadcrumb" : User has clicked on the name
// of the topic in the breadcrumbs
// Behaviour:
// - Display the list of Articles for the topic
// The topic name is passed to the ArticlesListContainer in order to display
// in the breadcrumbs.
const params = new URLSearchParams(props.location.search);
const topicName = params.get('topicName');
return (
<ArticlesListContainer
topicId={props.match.params.topicId}
topicName={topicName}
/>
);
}}
/>
<Route
exact
path="/article/:articleId"
render={(props) => {
// ARTICLE DETAILS
// URL FORMAT : /article/articleId?topicName=name&topicId=id
//
// Called from :
// - "ArticleListItem" : user has clicked on an Article in the articles listing
// Behaviour:
// - Display the details of that Articles
// The topic name and topic id are passed to the ArticleDetailsContainer
// in order to display in the breadcrumbs and enabling the user to click on
// the topic name to go back to seeing the list of articles in that topic.
const params = new URLSearchParams(props.location.search);
const topicName = params.get('topicName');
const topicId = params.get('topicId');
return (
<ArticleDetailsContainer
articleId={props.match.params.articleId}
topicName={topicName}
topicId={topicId}
/>
);
}}
/>
<Route exact component={NotFound} />
</Switch>
</Router>
),
document.getElementById('root'),
);Now that we have some initial routes in place, we need to begin the work of creating our components and integrating them with Oracle Content Management. If we were to spin up our local development server with only this
index.jsxhttps://localhost:3000src/styles.cssIn order to resolve those errors originating from the missing components, however, we’ll need to first provide our Oracle Content Management server configuration to our new React application and implement the Oracle Content Management Content SDK, which makes the process of querying Oracle Content Management’s content delivery API much easier.
Providing server configuration to React
Our first step to provide the configuration of our Oracle Content Management server is to create a new JSON file named
src/config/oce.jsonchannelTokenCreate a new file at
src/config/oce.jsonserverUrlapiVersionchannelToken// src/config/oce.json
{
"serverUrl": "https://samples.mycontentdemo.com",
"apiVersion": "v1.1",
"channelToken": "47c9fb78774d4485bc7090bf7b955632"
}This JSON object in its current state refers to the publicly available Oracle Content Management instance associated with all of Oracle Content Management’s open-source boilerplates, but you’ll need to change the
serverUrlchannelTokenOur next step is to implement the Oracle Content Management Content SDK, which makes things easier for developers to issue queries against and handle responses from the REST APIs found in Oracle Content Management. Though one of the benefits of the Content SDK is that it can be used server-side or client-side, note that use of the Content SDK is optional, and it’s perfectly fine to issue queries directly against the Content Delivery API in Oracle Content Management. For more information about issuing API requests directly, consult the Oracle Content Management API documentation.
Implementing the Oracle Content Management Content SDK
Now, we need to implement the Oracle Content Management Content SDK by instantiating a new delivery client and accessing the configuration values we just defined above. Add a new file at
src/scripts/server-config-utils.jsgetDeliveryClient()// src/scripts/server-config-utils.js
import { createDeliveryClient } from 'contentsdk/content.min';
import data from '../config/oce.json';
/**
* Creates a ContentSDK Delivery Client from the data defined in
* "oce.json".
*/
export default function getDeliveryClient() {
// the "oce.json" has different key names to that
// which is expected for the ContentSDK code, therefore we have to
// have a new object with the keys that the ContentSDK is expecting.
const serverconfig = {
contentServer: data.serverUrl,
contentVersion: data.apiVersion,
channelToken: data.channelToken,
};
// Add the following if you want logging from the ContentSDK shown in the console
// serverconfig.logger = console;
// Obtain the delivery client from the Content Delivery SDK
// using the specified configuration information
const deliveryClient = createDeliveryClient(serverconfig);
return deliveryClient;
}Next, let’s create a series of service methods that we’ll use to wrap queries made available through the delivery client in promises. This means that whenever we need to access this remote data from within our React application’s components, we can simply leverage the service methods rather than issuing queries against the API each time, though this is perfectly acceptable for developers who prefer finer-grained control over requests. For more information about how we created this content model, consult the quickstart guide to Oracle Content Management as a headless CMS.
// src/scripts/services.js
/**
  * This file contains a number of utility methods used to obtain data
  * from the server using the ContentSDK JavaScript Library.
  */
/*
 * Utility method to log an error.
 */
function logError(message, error) {
  if (error && error.statusMessage) {
    console.log(`${message} : `, error.statusMessage);
  } else if (error.error && error.error.code && error.error.code === 'ETIMEDOUT') {
    console.log(`${message} : `, error);
  } else if (error.error && error.error.code) {
    console.log(`${message} : `, error.error.code);
  } else if (error) {
    console.error(message, error);
  }
}
First, we provide a method to acquire the home page items:
// src/scripts/services.js, continued
/**
 * Fetch the top level values to be displayed on the home page.
 *
 * @param {DeliveryClient} client - The delivery client which will execute the search
 * @returns {Promise({object})} - A Promise containing the data to display on the top level page
 */
export function fetchHomePage(client) {
  return client.queryItems({
    q: '(type eq "OCEGettingStartedHomePage" AND name eq "HomePage")',
      fields: 'all',
  }).then((topLevelItem) => {
    const returnVal = {
      logoID: topLevelItem.items[0].fields.company_logo.id,
      title: topLevelItem.items[0].fields.company_name,
      topics: topLevelItem.items[0].fields.topics,
      aboutUrl: topLevelItem.items[0].fields.about_url,
      contactUrl: topLevelItem.items[0].fields.contact_url,
    };
    return returnVal;
  }).catch((error) => logError('Getting home page data failed', error));
}
Then, we write methods to fetch each individual topic item from the Oracle Content Management instance:
// src/scripts/services.js, continued
/**
 * Fetch details about the specific topic
 *
 * @param {DeliveryClient} client - The delivery client which will execute the search
 * @param {String} topicId - the id of the topic
 * @returns {*} - the topic
 */
export function fetchTopic(client, topicId) {
  return client.getItem({
    id: topicId,
    fields: 'all',
    expand: 'all',
  }).then((topic) => topic)
    .catch((error) => logError('Fetching topic failed', error));
}
And this is followed by all of the articles for a given topic, as well as each article’s fields.
// src/scripts/services.js, continued
/**
 * Get all the articles for the specified topic.
 *
 * @param {DeliveryClient} client - The delivery client which will execute the search
 * @param {String} topicId - the id of the topic
 * @returns {*} - the list of articles for the topic
 */
export function fetchArticles(client, topicId) {
  return client.queryItems({
    q: `(type eq "OCEGettingStartedArticle" AND fields.topic eq "${topicId}")`,
    fields: 'all',
    orderBy: 'fields.published_date:desc',
  }).then((articles) => articles.items)
    .catch((error) => logError('Fetching articles failed', error));
}

/**
 * Get details of the specified article.
 *
 * @param {DeliveryClient} client - The delivery client which will execute the search
 * @param {String} articleId - The id of the article
 * @returns {*} - the article
 */
export function fetchArticle(client, articleId) {
  return client.getItem({
    id: articleId,
    expand: 'all',
  }).then((article) => article)
    .catch((error) => logError('Fetching article failed', error));
}
Finally, in order to retrieve the images for each of the articles available in our blog content model, we use Oracle Content Management’s native image renditions to fetch those image asset URLs. Here, we provide a method to retrieve the medium-sized rendition of the image:
// src/scripts/services.js, continued
/**
 * Return the thumbnail URL for the specified item.
 *
 * @param {DeliveryClient} client - The delivery client which will execute the search
 * @param {String} identifier - the Id of the item whose thumbnail URL is required
 * @returns {String} - the thumbnail URL
 */
export function getMediumRenditionURL(client, identifier) {
  return client.getItem({
    id: identifier,
    fields: 'all',
    expand: 'all',
  }).then((asset) => {
    const object = asset.fields.renditions.filter((item) => item.name === 'Medium')[0];
    const format = object.formats.filter((item) => item.format === 'jpg')[0];
    const self = format.links.filter((item) => item.rel === 'self')[0];
    const url = self.href;
    return url;
  }).catch((error) => logError('Fetching medium rendition URL failed', error));
}

/**
 * Return the rendition URL for the specified item.
 *
 * @param {DeliveryClient} client - The delivery client which will execute the search
 * @param {String} identifier - the Id of the item whose rendition URL is required
 * @returns {String} - the rendition URL
 */
export function getRenditionURL(client, identifier) {
  const url = client.getRenditionURL({
    id: identifier,
  });
  return Promise.resolve(url);
}
Then, we’ll add an additional utility method in another file to help us handle dates from the Oracle Content Management instance natively in JavaScript:
// src/scripts/utils.js
export default function dateToMDY(date) {
  const dateObj = new Date(date);
  const options = {
    year: 'numeric',
    month: 'long',
    day: 'numeric',
  };
  const formattedDate = dateObj.toLocaleDateString('en-US', options);
  return formattedDate;
}
Our next step is to implement these service and utility methods within each of the React components where they’ll be needed to provide the data we need from the Oracle Content Management instance. To do that, we’ll create files representing each of the components that need to be rendered into our application to populate the routes for the global router we wrote in previous sections.
Adding components
The React library operates with components as the atomic unit. These components are typically placed in individual files and also represent React’s philosophy to place data requirements and rendering logic within the same file to aid the developer experience. In React, components are both nestable and reusable, which means they can be used in many arbitrary locations in our application.
Adding shared and unique components
First, let’s add shared components that will be used by other components, namely the application header and breadcrumbs, and a unique component, the 404 page. Add a new component that represents our header by creating a new directory named
componentssrcsrc/components/Header.jsx// src/components/Header.jsx
import React from 'react';
import PropTypes from 'prop-types';
/**
* React component for rendering the header of the home page
*
* @param {string} companyTitle The company's title
* @param {string} companyThumbnailUrl The URL of the company's icon
* @param {string} aboutUrl The URL for the About link
* @param {string} contactUrl The URL for the Contact Us link
*/
const Header = (props) => {
const {
companyTitle, companyThumbnailUrl, aboutUrl, contactUrl,
} = props;
return (
<div className="logo" data-testid="Header">
<img id="company-thumbnail" src={companyThumbnailUrl} alt="Company icon" />
<h1 id="company-title">{companyTitle}</h1>
<ul>
<li><a id="about" href={aboutUrl}>About Us</a></li>
<li><a id="contact" href={contactUrl}>Contact Us</a></li>
</ul>
</div>
);
};
/*
* Define the type of data used in this component.
*/
Header.propTypes = {
companyTitle: PropTypes.string.isRequired,
companyThumbnailUrl: PropTypes.string.isRequired,
aboutUrl: PropTypes.string.isRequired,
contactUrl: PropTypes.string.isRequired,
};
export default Header;Second, we need to add the breadcrumb components that allow users of our React application to navigate seamlessly between articles and their topics. The smaller breadcrumb component provides an unordered list item element that identifies both higher-level and current links
// src/components/Breadcrumb.jsx
import React from 'react';
import { Link } from 'react-router-dom';
import PropTypes from 'prop-types';

/**
 * Component representing a single breadcrumb to be rendered in breadcrumbs.
 *
 * @param {object} linkParams contains the object to set for the "to" parameter
 *                            to the "Link" component when not empty, a "Link"
 *                            component is added arround the text,
 *                            when empty the text is rendered on its own
 *                            (i.e. no hyperlinking)
 * @param {string} text the text for the breadcrumb
 */
const Breadcrumb = (props) => {
  const { linkParams, text } = props;
  const includeLinkParams = Object.keys(linkParams).length > 0 && linkParams.constructor === Object;

  return (
    <li>
      {includeLinkParams
        ? <Link to={linkParams}>{text}</Link>
        : text}
    </li>
  );
};

/*
 * Define the type of data used in this component.
 */
Breadcrumb.propTypes = {
  linkParams: PropTypes.shape({
    pathname: PropTypes.string,
    search: PropTypes.string,
  }),
  text: PropTypes.string.isRequired,
};

Breadcrumb.defaultProps = {
  linkParams: {},
};

export default Breadcrumb;
Our next step is to add the container component responsible for rendering the overarching breadcrumbs component, which loops through each link in the breadcrumb trail and renders it into a breadcrumb component within an unordered list:
// src/components/Breadcrumbs.jsx
import React from 'react';
import PropTypes from 'prop-types';

import Breadcrumb from './Breadcrumb';

/**
 * Component representing a set of breadcrumbs.
 *
 * @param {array} breadcrumbsData the list of objects for each breadcrumb
 */
const Breadcrumbs = (props) => {
  const { breadcrumbsData } = props;

  return (
    <div id="breadcrumb">
      <ul>
        {breadcrumbsData.map(
          (breadcrumbData) => (
            <Breadcrumb
              key={breadcrumbData.text}
              linkParams={breadcrumbData.linkParams}
              text={breadcrumbData.text}
            />
          ),
        )}
      </ul>
    </div>
  );
};

/*
 * Define the type of data used in this component.
 */
Breadcrumbs.propTypes = {
  breadcrumbsData: PropTypes.arrayOf(
    PropTypes.shape({ BreadCrumb }.propTypes),
  ).isRequired,
};

export default Breadcrumbs;
Third, a standard page on all web applications is a 404 Not Found page, for which we will provide a very rudimentary implementation through a component that will be rendered whenever a malformed path is navigated to:
// src/components/NotFound.jsx
import React from 'react';

/**
 * Functional Component for the Not Found Screen
 */
const NotFound = () => (
  <div>
    <h1>
      Page Not Found
    </h1>
  </div>
);

export default NotFound;
With these shared and unique components completed, we can move into the most complicated elements of our React application: the nested components where our articles and topics reside.
Adding nested topic components
Now, let’s add a topic item component that will be used within our topics list component. Add the following file, which imports
Linkreact-router-dom// src/components/TopicListItem.jsx
import React from 'react';
import { Link } from 'react-router-dom';
import PropTypes from 'prop-types';
/**
* Component representing a Topic displayed in the list of topics.
*
* Note: This is called from "TopicListItemContainer" which gets the data
* to display in this component, this design is to keep the model and view separate.
*
* @param {string} name The topic's name
* @param {string} imageUrl The URL of the topics thumbnail image
* @param {string} description The topic's description
* @param {string} topicId The ID of the Topic, used to render links to child views
*/
const TopicListItem = (props) => {
const {
title, imageUrl, description, topicId,
} = props;
// whole view is wrapped in a "Link" component with the URL of the format
// /articles/topicId?topicName=name
// "index.js" will route a URL of this format to "ArticlesListContainer"
// Note the textDecoration style added to the Link component, this is to ensure
// any text in elements inside this Link component are not rendered with an
// underline like standard <a> links are rendered (Link gets decompiled down
// to <a> elements.)
return (
<Link to={{ pathname: `/articles/${topicId}`, search: `?topicName=${title}` }} style={{ textDecoration: 'none' }}>
<div className="topic">
<div className="button-wrapper">
<div className="button">{title}</div>
</div>
<img src={imageUrl} alt="Topic Thumbnail" />
<div className="desc-wrapper">
<div className="description">{description}</div>
</div>
</div>
</Link>
);
};
/*
* Define the type of data used in this component.
*/
TopicListItem.propTypes = {
title: PropTypes.string.isRequired,
imageUrl: PropTypes.string.isRequired,
description: PropTypes.string.isRequired,
topicId: PropTypes.string.isRequired,
};
export default TopicListItem;Next, add a container component for each topic item which fetches the requisite data using the
fetchTopicgetMediumRenditionURL// src/components/TopicListItemContainer.jsx
import React from 'react';
import PropTypes from 'prop-types';
import getDeliveryClient from '../scripts/server-config-utils';
import { fetchTopic, getMediumRenditionURL } from '../scripts/services';
import TopicListItem from './TopicListItem';
/**
* Component responsible for getting the the data for a single Topic
* to display for that topic when rendered in the list of topics.
*
* Note: This actual data is rendered in the "TopicListItem",
* this design is to keep the model and view separate.
*
* @param {string} id The ID of the Topic
*/
export default class TopicListItemContainer extends React.Component {
constructor(props) {
super(props);
this.mounted = false;
this.state = {
title: '',
description: '',
url: '',
};
}
/**
* Load the data for the specific topic
*/
componentDidMount() {
this.mounted = true;
// get the client to connect to CEC
const deliveryClient = getDeliveryClient();
const { id } = this.props;
// fetch the topic
fetchTopic(deliveryClient, id)
.then((topic) => {
// once the topic is obtained, fetch the URL for the topic's thumbnail
getMediumRenditionURL(deliveryClient, topic.fields.thumbnail.id)
.then((thumbnailUrl) => {
if (this.mounted) {
this.setState({
title: topic.name,
description: topic.description,
url: thumbnailUrl,
});
}
});
});
}
/*
* Called when the component unmounts.
*/
componentWillUnmount() {
this.mounted = false;
}and renders the data into the topic item component such that the links appear with their correct text and image:
// src/components/TopicListItemContainer.jsx, continued
  /*
   * Render the TopicListItem to display the topic item
   */
  render() {
    const { id } = this.props;
    const { title, url, description } = this.state;

    return (
      <TopicListItem
        title={title}
        imageUrl={url}
        description={description}
        topicId={id}
      />
    );
  }
}

/*
 * Define the type of data used in this component.
 */
TopicListItemContainer.propTypes = {
  id: PropTypes.string.isRequired,
};
// src/components/TopicsList.jsx
import React from 'react';
import PropTypes from 'prop-types';

import TopicListItemContainer from './TopicListItemContainer';

/**
 * Component representing a list of Topics.
 *
 * Note: This is called from "TopicsListContainer" which gets the data
 * to display in this component, this design is to keep the model and view separate.
 *
 * @param {array} topicIds the list of topic ids
 */
const TopicsList = (props) => {
  const { topicIds } = props;

  return (
    <div id="topics">
      {topicIds.map(
        (topicId) => (
          <TopicListItemContainer
            key={topicId}
            id={topicId}
          />
        ),
      )}
    </div>
  );
};

/*
 * Define the type of data used in this component.
 */
TopicsList.propTypes = {
  topicIds: PropTypes.arrayOf(PropTypes.string.isRequired).isRequired,
};

export default TopicsList;
The topics list component is listed inside a topics list container component inside which we’ll nest all of the components we’ve created until now. Add another component representing the topics list container component:
// src/components/TopicsListContainer.jsx
import React from 'react';

import getDeliveryClient from '../scripts/server-config-utils';
import { fetchHomePage, getRenditionURL } from '../scripts/services';

import TopicsList from './TopicsList';
import Header from './Header';

/**
 * Component representing a list of Topics with a header area
 * containing company logo, company name, Contact Us and About Us Links.
 */
export default class TopicsListContainer extends React.Component {
  constructor(props) {
    super(props);

    this.mounted = false;

    this.state = {
      loading: true,
      error: false,
      companyTitle: '',
      companyThumbnailUrl: '',
      aboutUrl: '',
      contactUrl: '',
      topicIds: [],
    };
  }
Within this component, we’ll provide data from the Oracle Content Management instance via the invocation of
fetchHomePagegetRenditionURL// src/components/TopicsListContainer.jsx, continued
/**
* Load the data for the topics list
*/
componentDidMount() {
this.mounted = true;
// set the browser tab title
document.title = 'Topics';
// get the client to connect to CEC
const deliveryClient = getDeliveryClient();
// get the top level item which contains the following information
// - aboutURL / contactURL / thumbnailURL / company title
// - array of topic ids : These are passed to TopicsList
fetchHomePage(deliveryClient)
.then((topLevelItem) => {
getRenditionURL(deliveryClient, topLevelItem.logoID)
.then((url) => {
const topicIdentifiers = topLevelItem.topics.map((topic) => topic.id);
if (this.mounted) {
this.setState({
companyTitle: topLevelItem.title,
companyThumbnailUrl: url,
aboutUrl: topLevelItem.aboutUrl,
contactUrl: topLevelItem.contactUrl,
topicIds: topicIdentifiers,
});
}
})
.catch(() => { this.setState({ error: true }); });
})
.then(() => this.setState({ loading: false }))
.catch(() => { this.setState({ error: true }); });
}
/*
* Called when the component unmounts.
*/
componentWillUnmount() {
this.mounted = false;
}Next, we’ll provide the rendering of the component using JSX representing the bulk of the home page, which provides the header as well as the topics list containing all of the topics for our blog application:
// src/components/TopicsListContainer.jsx
  /*
   * Render this component
   */
  render() {
    const {
      error, loading, companyTitle, companyThumbnailUrl, aboutUrl, contactUrl, topicIds,
    } = this.state;

    return (
      <div>
        {/* Render error */}
        {error && (
          <div className="error">
            Oops, something went wrong.  Please verify that you have seeded
            data to the server and configured your serverUrl and channelToken.
          </div>
        )}

        {/* Render loading */}
        {loading && !error && (
          <div className="progress-spinner" />
        )}

        {/* Render data */}
        {!error && !loading && (
          <div data-testid="TopicsListContainer">
            <Header
              companyTitle={companyTitle}
              companyThumbnailUrl={companyThumbnailUrl}
              aboutUrl={aboutUrl}
              contactUrl={contactUrl}
            />
            <TopicsList topicIds={topicIds} />
          </div>
        )}
      </div>
    );
  }
}
Now that we have our topic components, we now need to create the individual article components that will render each arbitrary article and fall into each of the topics represented by the topic item and topic list components we just created.
Adding nested article components
First, we need to create a component that represents an individual article. This
ArticleDetailsBreadcrumbArticleDetails.jsx// src/components/ArticleDetails.jsx
import filterXSS from 'xss';
import React from 'react';
import PropTypes from 'prop-types';
import dateToMDY from '../scripts/utils';
import Breadcrumbs from './Breadcrumbs';
/**
* Component representing Article details.
*
* Note: This is called from "ArticleDetailsContainer" which gets the data
* to display in this component, this design is to keep the model and view separate.
*
* @param {object} article The Article to display
* @param {string} authorAvatarUrl The URL for the Authors avatar image
* @param {string} articleImageUrl The URL for the article image
* @param {string} topicId The id of the topic, used when rendering breadcrumbs
* @param {string} topicName The topic name, used when rendering breadcrumbs
*/
const ArticleDetails = (props) => {
// get values passed into this component
const {
article, authorAvatarUrl, articleImageUrl, topicId, topicName,
} = props;Within this component, one of the first actions is to leverage our date formatter utility functions we wrote earlier to process the date into a human-readable format:
// src/components/ArticleDetails.jsx, continued
  const formattedDate = `Posted on ${dateToMDY(article.fields.published_date.value)}`;
  const options = {
    stripIgnoreTag: true, // filter out all HTML not in the whitelist
    stripIgnoreTagBody: ['script'], // the script tag is a special case, we need
    // to filter out its content
  };
We also populate the necessary breadcrumbs data using information garnered from the current article, which will be sent as props into the breadcrumbs component we created earlier:
// src/components/ArticleDetails.jsx, continued
  const cleancontent = filterXSS(article.fields.article_content, options);
  // Breadcrumbs :  Home > topicName > articleName (read only)
  // - "Home" url      =  "/"
  // - "topicName" url =  "/articles/topicId?topicName=name"
  const breadcrumbsData = [
    {
      linkParams: { pathname: '/' },
      text: 'Home',
    },
    {
      linkParams: { pathname: `/articles/${topicId}`, search: `?topicName=${topicName}` },
      text: topicName,
    },
    {
      linkParams: {},
      text: article.name,
    },
  ];
Finally, we provide rendering logic for the individual article component, which displays the breadcrumb trail, an image of the article’s author as well as the image associated with the article, and the article content, all of which require information from the Oracle Content Management instance.
// src/components/ArticleDetails.jsx, continued
  return (
    <div>
      <Breadcrumbs breadcrumbsData={breadcrumbsData} />

      <div id="article">
        <div className="author">
          {/* Avatar */}
          <img src={authorAvatarUrl} alt="Author Avatar" />

          {/*  Author Name / Date */}
          <div className="name_date">
            <h4 className="title">{article.fields.author.name}</h4>
            <div className="date">
              {formattedDate}
              {' '}
            </div>
          </div>
        </div>

        {/* Article Image and caption */}
        <figure>
          <img src={articleImageUrl} alt="Article" />
          <figcaption>{article.fields.image_caption}</figcaption>
        </figure>

        {/* Article Content */}
        <div className="content">
          { article.fields.article_content.indexOf('</') !== -1
            ? (
              // eslint-disable-next-line react/no-danger
              <div dangerouslySetInnerHTML={{ __html: cleancontent }} />
            )
            : cleancontent}
        </div>
      </div>
    </div>
  );
};

/*
 * Define the type of data used in this component.
 */
ArticleDetails.propTypes = {
  topicId: PropTypes.string.isRequired,
  topicName: PropTypes.string.isRequired,
  authorAvatarUrl: PropTypes.string,
  articleImageUrl: PropTypes.string.isRequired,
  article: PropTypes.shape({
    name: PropTypes.string.isRequired,
    fields: PropTypes.shape({
      image_caption: PropTypes.string.isRequired,
      article_content: PropTypes.string.isRequired,
      published_date: PropTypes.shape({
        value: PropTypes.string.isRequired,
      }),
      author: PropTypes.shape({
        name: PropTypes.string.isRequired,
      }),
    }),
  }).isRequired,
};

ArticleDetails.defaultProps = {
  authorAvatarUrl: '',
};

export default ArticleDetails;
Then, we need a container component to distinguish the view logic from the model logic, as follows. First, let’s set up the component and our state object:
// src/components/ArticleDetailsContainer.jsx
import React from 'react';
import PropTypes from 'prop-types';

import getDeliveryClient from '../scripts/server-config-utils';
import { fetchArticle, getRenditionURL, getMediumRenditionURL } from '../scripts/services';

import ArticleDetails from './ArticleDetails';

/**
 * Component responsible for getting the details of an Article.
 *
 * Note: This actual data is rendered in the "ArticleDetails",
 * this design is to keep the model and view separate.
 *
 * This is called from "index.js" in the Router section when a user has clicked
 * on a link defined in "ArticleListItem".
 *
 * @param {string} articleId The ID of the Article, used to get article information from the server
 * @param {string} topicName The name of the topic, used when rendering breadcrumbs
 * @param {string} topicId The if of the topic, used when rendering breadcrumbs
 */
export default class ArticleDetailsContainer extends React.Component {
  constructor(props) {
    super(props);

    this.mounted = false;

    this.state = {
      loading: true,
      error: false,
      article: {},
    };
  }
Second, we provide the retrieval logic to satisfy our data requirements using the
fetchArticlegetRenditionURLgetMediumRenditionURL// src/components/ArticleDetailsContainer.jsx, continued
componentDidMount() {
this.mounted = true;
// set the browser tab title
document.title = 'Article';
// get the client to connect to CEC
const deliveryClient = getDeliveryClient();
// get values passed into this component
const { articleId } = this.props;
// Get the article details
fetchArticle(deliveryClient, articleId)
.then((article) => {
if (this.mounted) {
this.setState({ article });
}
// get the article image URL
getRenditionURL(deliveryClient, article.fields.image.id)
.then((renditionUrl) => {
if (this.mounted) {
this.setState({ articleImageUrl: renditionUrl });
}
// Get the author's avatar image
getMediumRenditionURL(deliveryClient, article.fields.author.fields.avatar.id)
.then((thumbnailUrl) => {
if (this.mounted) {
this.setState({ authorAvatarUrl: thumbnailUrl });
}
});
});
})
.catch(() => {
this.setState({ error: true });
})
.then(() => this.setState({ loading: false }));
}
/*
* Called when the component unmounts.
*/
componentWillUnmount() {
this.mounted = false;
}Second, we need to include in the same component rendering logic that handles loading and error states through conditional rendering (
!error && !loadingArticleDetails// src/components/ArticleDetailsContainer.jsx, continued
/*
* Render an error if the article was not found.
* If the article was obtained ok render the "ArticleDetails" component
*/
render() {
const { topicId, topicName } = this.props;
const {
error, loading, article, articleImageUrl, authorAvatarUrl,
} = this.state;
return (
<div>
{/* Render error */}
{error && (
<p>
<h2>Article Not Found</h2>
<i>Unable to view article details.</i>
</p>
)}
{/* Render loading */}
{loading && !error && (
<div className="progress-spinner" />
)}
{/* Render data */}
{!error && !loading && (
<ArticleDetails
article={article}
articleImageUrl={articleImageUrl}
authorAvatarUrl={authorAvatarUrl}
topicName={topicName}
topicId={topicId}
/>
)}
</div>
);
}
}
/*
* Define the type of data used in this component.
*/
ArticleDetailsContainer.propTypes = {
topicId: PropTypes.string.isRequired,
topicName: PropTypes.string.isRequired,
articleId: PropTypes.string.isRequired,
};Within each topic list, we have a list of articles which represent article teasers (an article list item). Each of these article list items needs a component representing not the detail view, the components we just created, but rather the teaser view. Add this
ArticleListItem.jsxArticleDetails.jsx// src/components/ArticleListItem.jsx
import React from 'react';
import { Link } from 'react-router-dom';
import PropTypes from 'prop-types';
import dateToMDY from '../scripts/utils';
/**
* Component representing an Article List Item displayed in the list of articles.
*
* Note: This is called from "ArticleListItemContainer" which gets the data
* to display in this component, this design is to keep the model and view separate.
*
* @param {string} topicId The Topic to which the Article belongs, used when creating
* the link to the article details
* @param {string} topicName The Topic name, used to render breadcrumbs
* @param {object} article The Article to display
* @param {string} articleUrl The URL for the article's thumbnail
*/
const ArticleListItem = (props) => {
const {
topicId, topicName, article, articleUrl,
} = props;
const formattedDate = `Posted on ${dateToMDY(article.fields.published_date.value)}`;
// whole view is wrapped in a "Link" component with the URL of the format
// /articles/articleId?topicName=name&topicId=id
// "index.js" will route a URL of this format to "ArticleDetailsContainer"
return (
<Link
to={{
pathname: `/article/${article.id}`,
search: `?topicName=${topicName}&topicId=${topicId}`,
}}
style={{ textDecoration: 'none' }}
>
<div className="article">
<div className="title-date">
<h4 className="title">{article.name}</h4>
<div className="date">{formattedDate}</div>
</div>
<img src={articleUrl} alt="Article thumbnail" />
<div className="description">
{article.description}
</div>
</div>
</Link>
);
};
/*
* Define the type of data used in this component.
*/
ArticleListItem.propTypes = {
topicId: PropTypes.string.isRequired,
topicName: PropTypes.string.isRequired,
articleUrl: PropTypes.string.isRequired,
article: PropTypes.shape({
id: PropTypes.string.isRequired,
name: PropTypes.string.isRequired,
description: PropTypes.string.isRequired,
fields: PropTypes.shape({
published_date: PropTypes.shape({
value: PropTypes.string.isRequired,
}),
}),
}).isRequired,
};
export default ArticleListItem;Next, create the article list item container component to separate out the model and view components:
// src/components/ArticleListItemContainer.jsx
import React from 'react';
import PropTypes from 'prop-types';

import getDeliveryClient from '../scripts/server-config-utils';
import { getMediumRenditionURL } from '../scripts/services';

import ArticleListItem from './ArticleListItem';

/**
 * Component responsible for getting the thumbnail for an article before using
 * "ArticleListItem" to render the article.
 *
 * Note: This actual data is rendered in the "ArticleListItem",
 * this design is to keep the model and view separate.
 *
 * This is called from "index.js" in the Router section when a user has clicked
 * on a link defined in "TopicListItem".
 *
 * @param {object} article The Article whose URL is to be obtained before its displayed
 * @param {object} topicId The Id of the topic the article is for
 *                         (used only for links to child items)
 * @param {object} topicName The name of the topic the article is for
 *                           (used only for links to child items)
 */
export default class ArticleListItemContainer extends React.Component {
  constructor(props) {
    super(props);

    this.mounted = false;

    this.state = {
      loading: true,
      article: {},
      articleUrl: '',
    };
  }
We already have the article information we need to render the article list item thanks to importing the
ArticleListItemgetMediumRenditionURL// src/components/ArticleListItemContainer.jsx, continued
/**
* Load the data
*/
componentDidMount() {
this.mounted = true;
const { article } = this.props;
// get the client to connect to CEC
const deliveryClient = getDeliveryClient();
getMediumRenditionURL(deliveryClient, article.fields.image.id)
.then((url) => {
if (this.mounted) {
this.setState({
article, articleUrl: url,
});
}
})
.then(() => this.setState({ loading: false }));
}
/*
* Called when the component unmounts.
*/
componentWillUnmount() {
this.mounted = false;
}Then, add the following rendering code that passes the retrieved information, including topic information (
topicIdtopicNamearticlearticleUrlArticleListItem// src/components/ArticleListItemContainer.jsx, continued
render() {
const { topicId, topicName } = this.props;
const { loading, article, articleUrl } = this.state;
return (
<div>
{loading
? ''
: (
<ArticleListItem
topicId={topicId}
topicName={topicName}
article={article}
articleUrl={articleUrl}
/>
)}
</div>
);
}
}
/*
* Define the type of data used in this component.
*/
ArticleListItemContainer.propTypes = {
topicId: PropTypes.string.isRequired,
topicName: PropTypes.string.isRequired,
article: PropTypes.shape({
name: PropTypes.string.isRequired,
fields: PropTypes.shape({
image: PropTypes.shape({
id: PropTypes.string.isRequired,
}),
}),
}).isRequired,
};And now, let’s add the code for the article list component itself, required for each of the individual topic components, which will import its container component:
// src/components/ArticlesList.jsx
import React from 'react';
import PropTypes from 'prop-types';

import ArticleListItemContainer from './ArticleListItemContainer';
import Breadcrumbs from './Breadcrumbs';

/**
 * Component representing a list of Articles with a breadcrumb bar
 * at the top.
 *
 * Note: This is called from "ArticlesListContainer" which gets the data
 * to display in this component, this design is to keep the model and view separate.
 *
 * @param {array} articles the list of articles to render in this component
 * @param {string} topicId the ID of the topic
 * @param {string} topicName the name of the topic, used when rendering breadcrumbs
 */
const ArticlesList = (props) => {
  const { articles, topicId, topicName } = props;

  // Breadcrumbs :  Topics > topicName (read only)
  // - "Home" url =  "/"
  const breadcrumbsData = [
    {
      linkParams: { pathname: '/' },
      text: 'Home',
    },
    {
      linkParams: {},
      text: topicName,
    },
  ];

  return (
    <div data-testid="ArticlesList">
      <Breadcrumbs breadcrumbsData={breadcrumbsData} />

      <div id="articles">
        {articles.map(
          (article) => (
            <ArticleListItemContainer
              key={article.id}
              article={article}
              topicId={topicId}
              topicName={topicName}
            />
          ),
        )}
      </div>
    </div>
  );
};

/*
 * Define the type of data used in this component.
 */
ArticlesList.propTypes = {
  topicId: PropTypes.string.isRequired,
  topicName: PropTypes.string.isRequired,
  articles: PropTypes.arrayOf(
    PropTypes.shape({
      id: PropTypes.string.isRequired,
    }.propTypes),
  ).isRequired,
};

export default ArticlesList;
Now, let’s the article list’s container component, which is responsible for retrieving the data necessary for the article list and providing that data to the article list component for rendering:
// src/components/ArticlesListContainer.jsx
import React from 'react';
import PropTypes from 'prop-types';

import getDeliveryClient from '../scripts/server-config-utils';
import { fetchArticles } from '../scripts/services';

import ArticlesList from './ArticlesList';

/**
 * Component responsible for getting the list of articles for a topic.
 *
 * Note: This actual data is rendered in the "ArticlesList",
 * this design is to keep the model and view separate.
 *
 * @param {string} topicId The ID of the topic whose articles are to be obtained
 * @param {string} topicName The Name of the topic whose articles are to be obtained
 */
export default class ArticlesListContainer extends React.Component {
  constructor(props) {
    super(props);

    // keep track of whether this component is mounted or not
    this.mounted = false;

    // the component's state
    this.state = {
      loading: true,
      error: false,
      articles: {},
    };
  }

  /**
   * Load the data for the specific topic
   */
  componentDidMount() {
    this.mounted = true;

    // set the browser tab title
    document.title = 'Articles';

    // get the client to connect to CEC
    const deliveryClient = getDeliveryClient();

    const { topicId } = this.props;

    // fetch the articles for the topic
    fetchArticles(deliveryClient, topicId)
      .then((articles) => {
        if (this.mounted) {
          this.setState({ articles });
        }
      })
      .catch(() => { this.setState({ error: true }); })
      .then(() => this.setState({ loading: false }));
  }

  /*
   * Called when the component unmounts.
   */
  componentWillUnmount() {
    this.mounted = false;
  }

  /*
   * Render an error if the topic was not found.
   * If the found was obtained ok render the "ArticlesList" component
   */
  render() {
    const { topicId, topicName } = this.props;
    const { error, loading, articles } = this.state;

    return (
      <div data-testid="ArticlesListContainer">
        {/* Render error */}
        {error && (
          <p>
            <h2>Topic Not Found</h2>
            <i>Unable to list articles.</i>
          </p>
        )}

        {/* Render loading */}
        {loading && !error && (
          <div className="progress-spinner" />
        )}

        {/* Render data */}
        {!error && !loading && (
          <ArticlesList
            articles={articles}
            topicId={topicId}
            topicName={topicName}
          />
        )}
      </div>
    );
  }
}

/*
 * Define the type of data used in this component.
 */
ArticlesListContainer.propTypes = {
  topicId: PropTypes.string.isRequired,
  topicName: PropTypes.string.isRequired,
};
And there you have it! That’s our final component that allows our entire application to come together.
Conclusion
Now that we have a fully formed React application based on CRA and using Oracle Content Management as a headless CMS, we can now restart our local development server to see the application in action:
$ npm startAs mentioned previously, to ready this application for a production deployment, we need to bundle and minify the application so it loads quickly in the browser. Fortunately, CRA already comes with Webpack and Babel preconfigured, meaning we don’t need to do any additional work besides executing the following command:
$ npm run buildExcellent! We now have a fully baked and ready-to-go JavaScript bundle that we can embed in our web pages to provide a functioning React blog application that consumes content from Oracle Content Management as a headless CMS. To see the completed repository after having completed all of these steps, consult the
branch of the csr
repository, where you can see all of the code we’ve written in context.oce-react-blog-sample
The open-source JavaScript and Jamstack ecosystem for Oracle Content Management is expanding every day, with a wide range of available codebases free for developers using React, jQuery, Oracle JET, Gatsby, and many more coming soon. For further insight into how you can leverage Oracle Content Management as a headless CMS in your universal and single-page applications or static sites, see my quickstart guide, our React blog sample, our Gatsby source plugin, and documentation for headless Oracle Content Management.
Special thanks to Leena Shah, Sarah Maslin, Ben Staveley-Taylor, Keith MacDonald, and Ankur Saxena, my colleagues at Oracle Content Management who created this React application.


