A quickstart guide to the dotCMS Universal Visual Editor with Next.js
May 14, 2024The Universal Visual Editor from dotCMS is a framework-agnostic visual editor that allows you to use a shared content authoring and visual building interface across both hybrid-headless architectures (dotCMS uses Velocity as its template engine) and headless architectures written in JavaScript, whether that means vanilla JavaScript, Next.js, React, or other frameworks still to come.
It’s a key architectural component of the universal content management system (CMS), an emerging paradigm for content management that empowers both content teams and developer teams to do their best work without depending on one another, regardless of the technology used to render the content or the channel that displays that content.
As I’ve written previously, the universal CMS is the next stage of the CMS, as headless and composable CMSs building visual editors and hybrid-headless CMSs expanding software development kit (SDK) ecosystems engage in convergent evolution. The universal CMS treats both content teams and developer teams as first-class citizens by allowing them to use authoring and visual editing tools across any JavaScript framework and any web-renderable presentation layer (e.g. WebXR).
Today, Next.js is commonplace as a flexible framework for React developers building websites that need to be statically generated or server-rendered, in conjunction with client-side interactions and asynchronous API round trips. Through its SDK ecosystem, dotCMS facilitates graceful integration for developers building Next.js applications consuming dotCMS content as data and full capabilities for editors who need to visually manage content destined for Next.js components.
In this quickstart guide, I’ll show you how to set up a dotCMS instance with boilerplate content and a fully integrated Next.js application with prefabricated components that are preconfigured to work seamlessly with the Universal Visual Editor. And we’ll do this all in less than fifteen minutes! Before we begin, ensure you have the Docker command-line interface (CLI), Node.js, and NPM installed on your machine, and have a terminal and code editor ready for use. If you use Docker Desktop, the Docker CLI is already available.
Set up a dotCMS demo instance in one command
To begin, you’ll need a dotCMS instance that contains boilerplate content that we use in the dotCMS Next.js example. You can use this single command to instantiate a dotCMS build; in this case, the container is based on dotCMS’s last nightly build:
docker run --rm \
--pull always \
-p 8082:8082 \
-p 8443:8443 \
-v $PWD/data:/data \
-e DOTCMS_SOURCE_ENVIRONMENT=https://demo.dotcms.com \
-e DOTCMS_USERNAME_PASSWORD="admin@dotcms.com:admin" \
 dotcms/dotcms-dev:nightly
This
dockerhttps://demo.dotcms.com80828443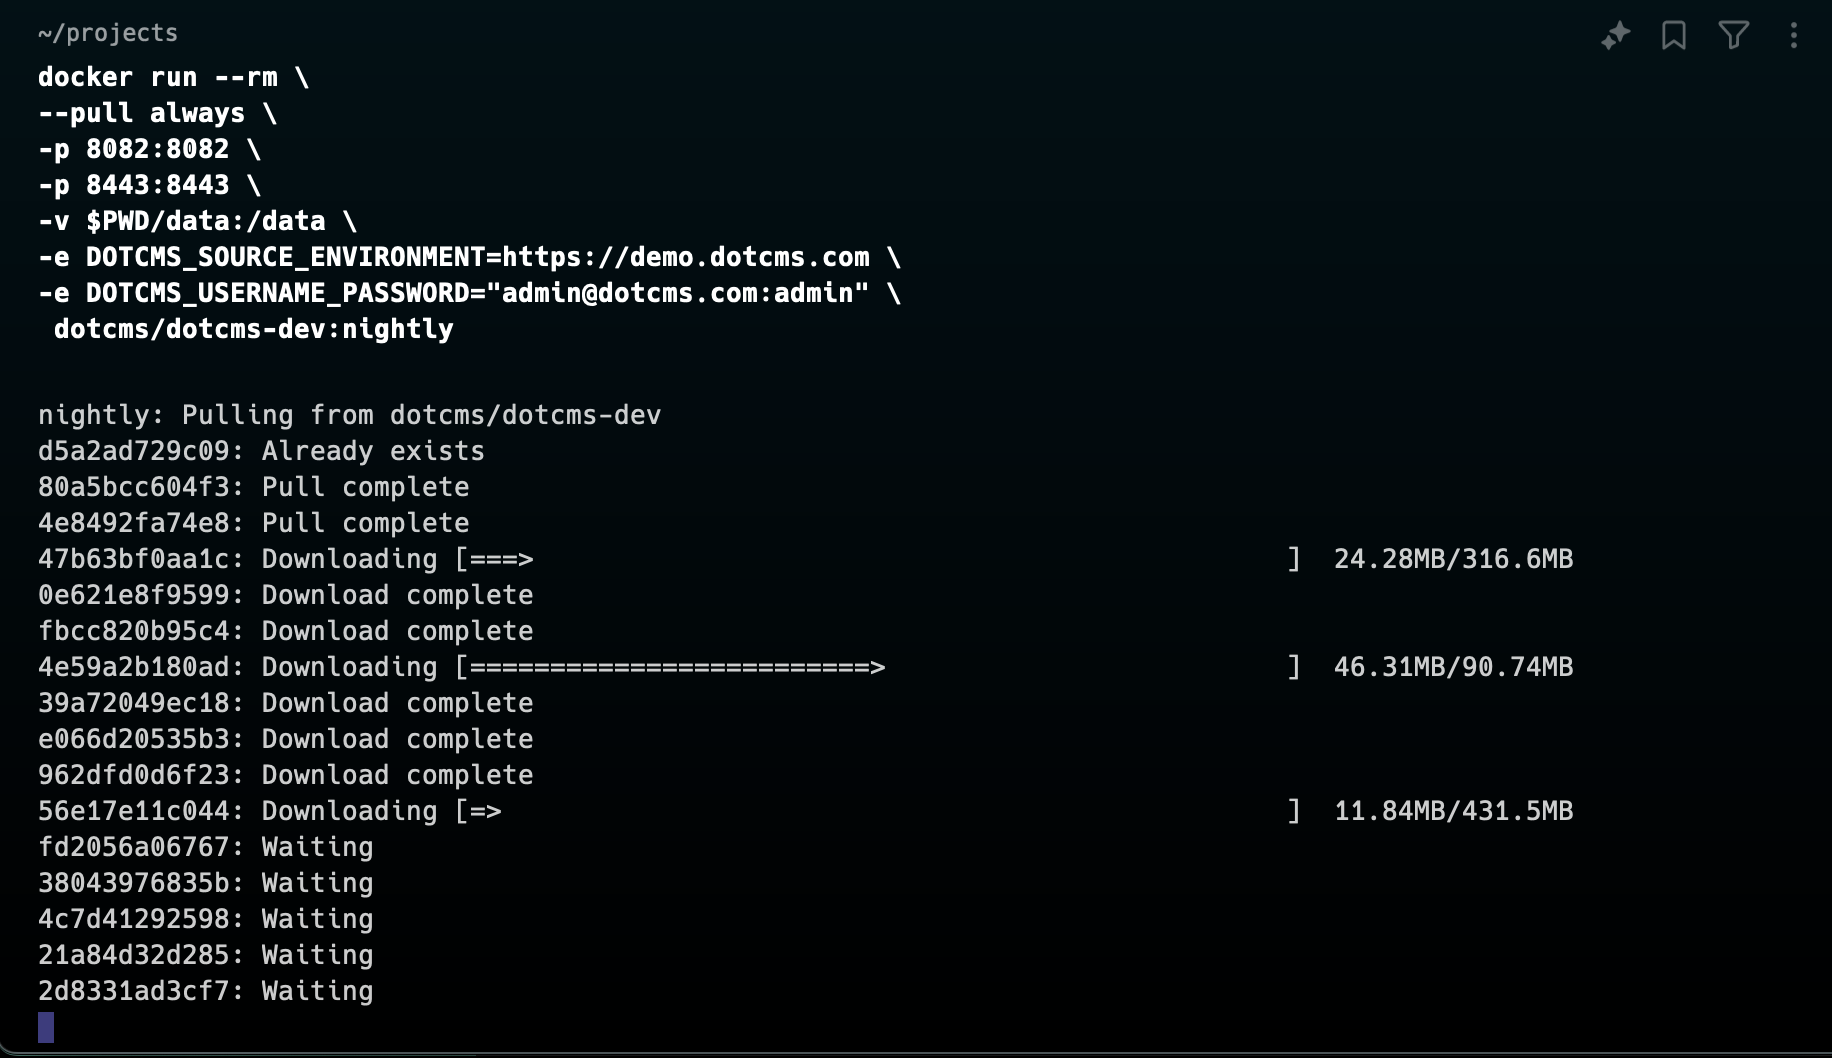
The result of executing docker run and instantiating a local dotCMS instance.
Navigate to
http://localhost:8082docker
The home page of our newly created local dotCMS instance contains standard demo content.
Now, navigate to
http://localhost:8082/dotAdminadmin@dotcms.comadmin
The login screen for the administrative interface of the local dotCMS instance.
The Next.js-enabled Universal Visual Editor requires an enterprise dotCMS license in order to proceed to the next step. If you don’t have one, you can contact the dotCMS sales team or use the demo instance that’s available online to consume content, located at
, which uses the same credentials. Keep in mind that the online dotCMS demo instance is wiped to a standard state every 24 hours for security reasons.https://demo.dotcms.com
To provision a license in your local dotCMS instance, navigate to Settings > Configuration and click on the Licensing tab and add a license by clicking the Upload License Pack button.
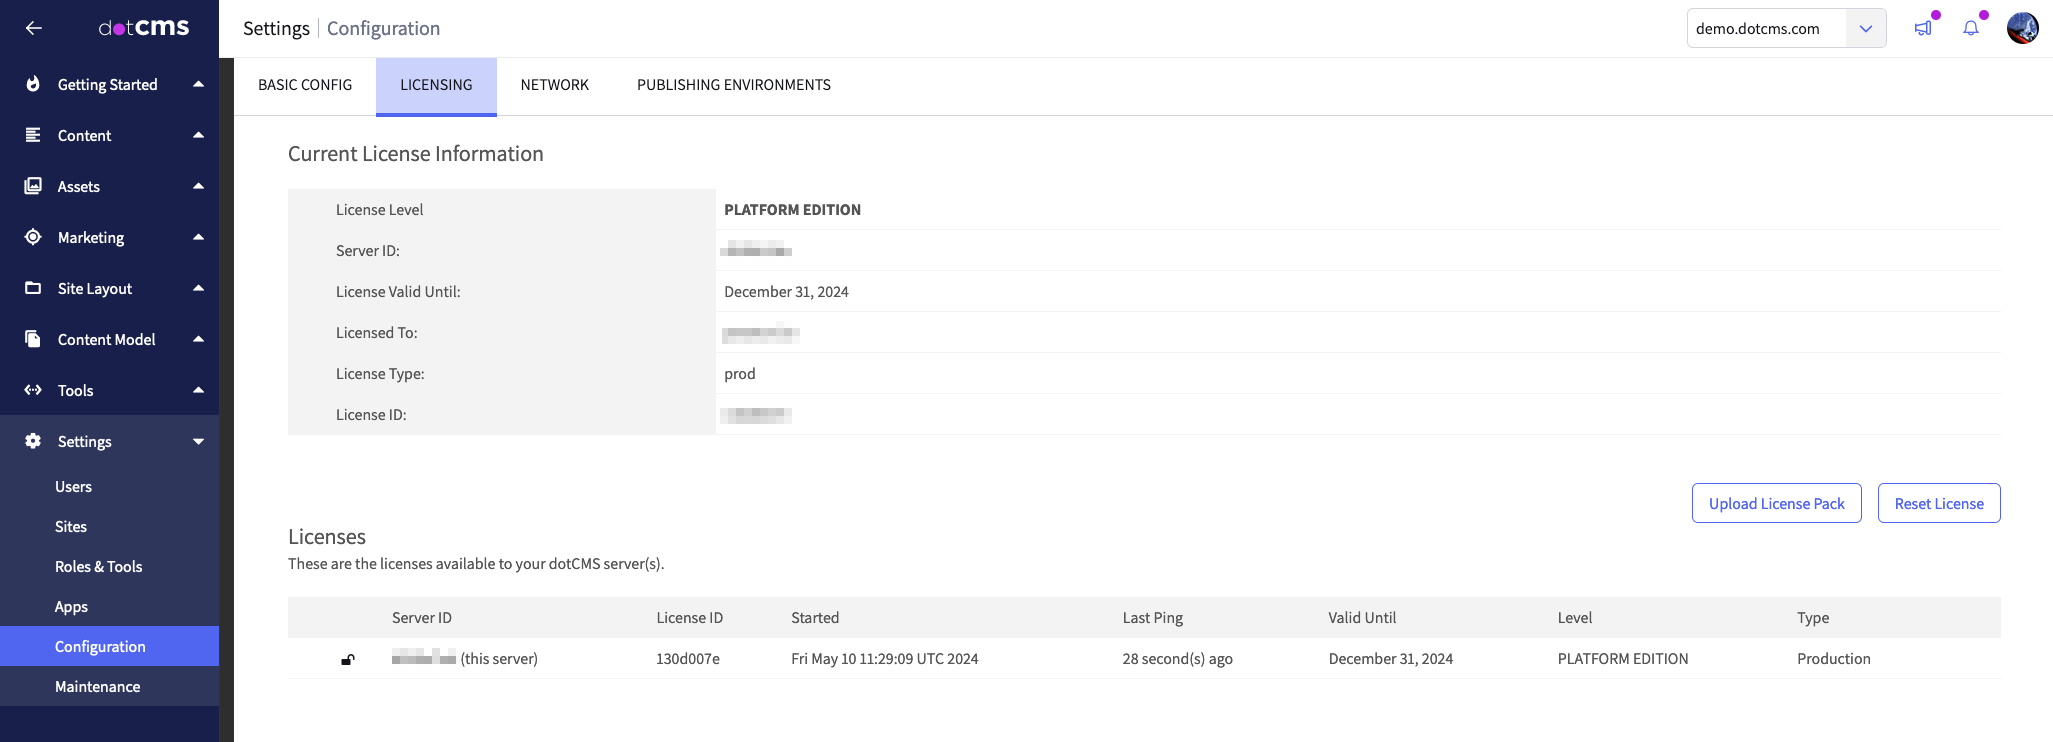
The Licensing page of dotCMS configuration, showing the currently applied license.
Finally, we’ll need an API access token in order to allow our Next.js application to consume dotCMS content without running into issues and so Universal Visual Editor works properly. Navigate to Settings > Users, select the root user (“Admin User”) and click the API Access Tokens tab. Create a new JSON web token (JWT), which we’ll use in our Next.js application. In the following screenshot, I’ve created a JWT with the “UVE Next.js” label.
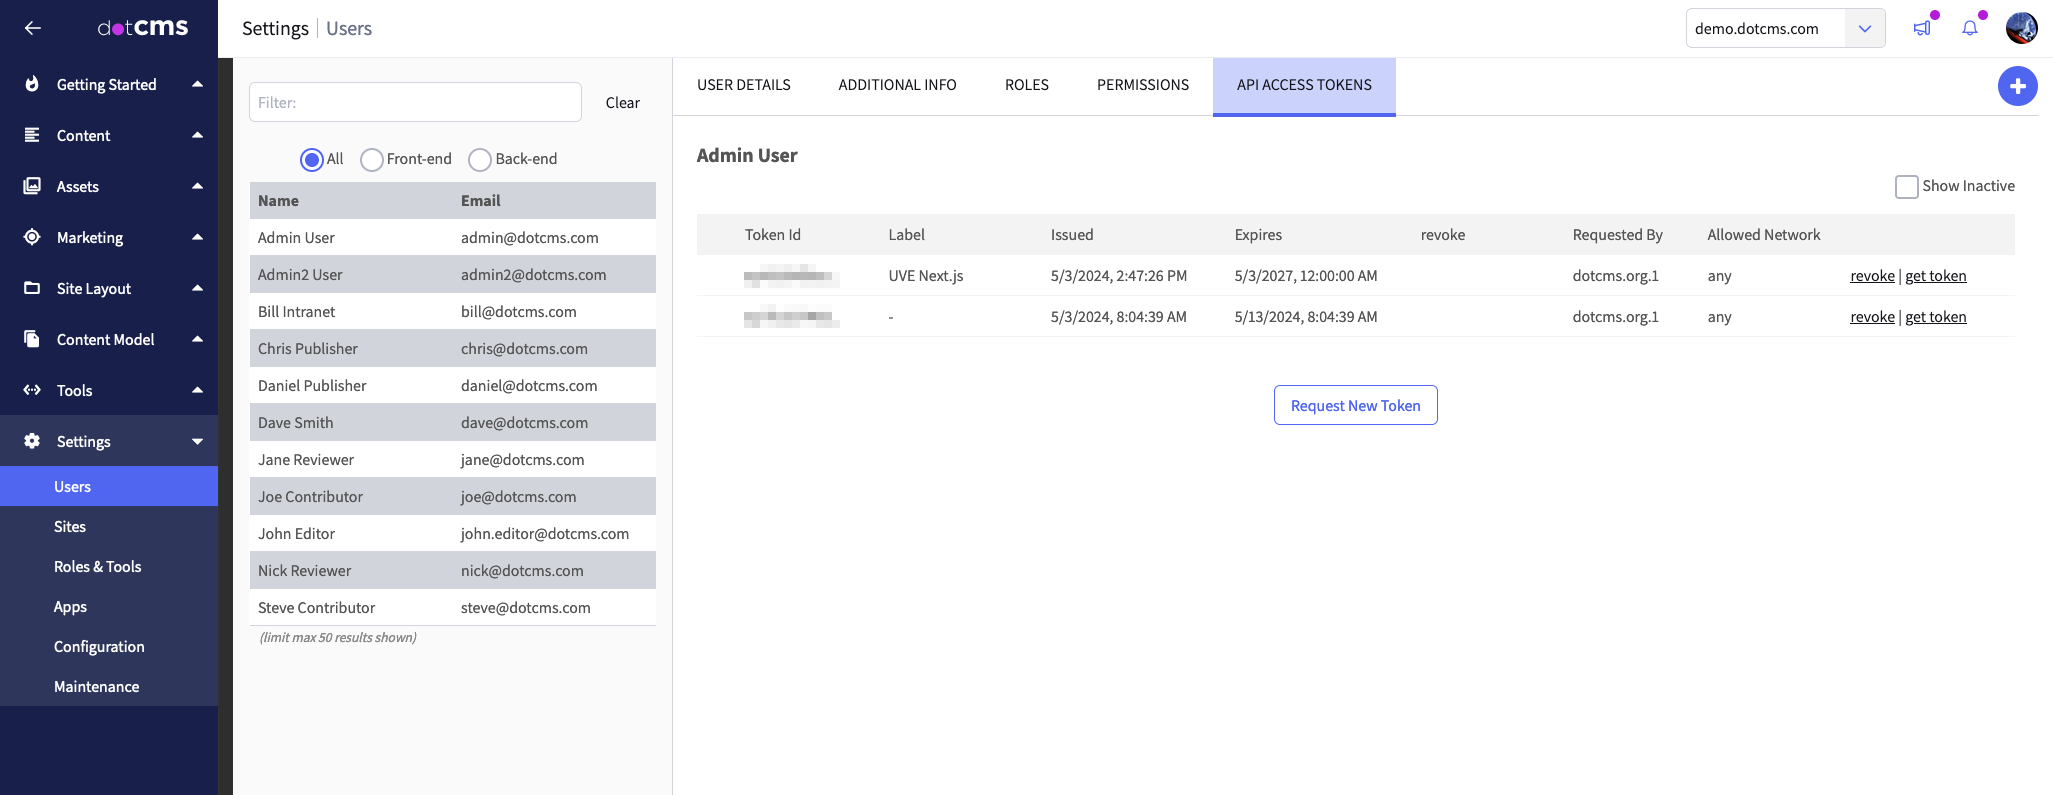
The newly created API access token for a Next.js application to consume dotCMS content.
Excellent! Our dotCMS instance is now ready to serve content to our Next.js application.
Create a dotCMS Next.js example application
You can create a new Next.js application based on the official dotCMS Next.js example by executing the following
npxdotcms-uve-nextjsnpx create-next-app dotcms-uve-nextjs --example https://github.com/dotcms/core/tree/master/examples/nextjsYou can also clone the Next.js example directly instead of using the
create-next-appw00t! Now we have a readymade Next.js application prepared for integration with dotCMS.
Add dotCMS configuration to Next.js example
Next, we need to configure the Next.js application to point to the dotCMS instance we have running locally so it can retrieve the required data to construct its pages and components.
First, open the Next.js application in your code editor (e.g.
code .dotcms-uve-nextjs.env.local.example.env.local.env.local
: This is the JWT for your local dotCMS instance, which can be found by navigating to Settings > Users, clicking on “Admin User,” and clicking “get token” in the table row where your JWT was created, as seen below.DOTCMS_AUTH_TOKEN
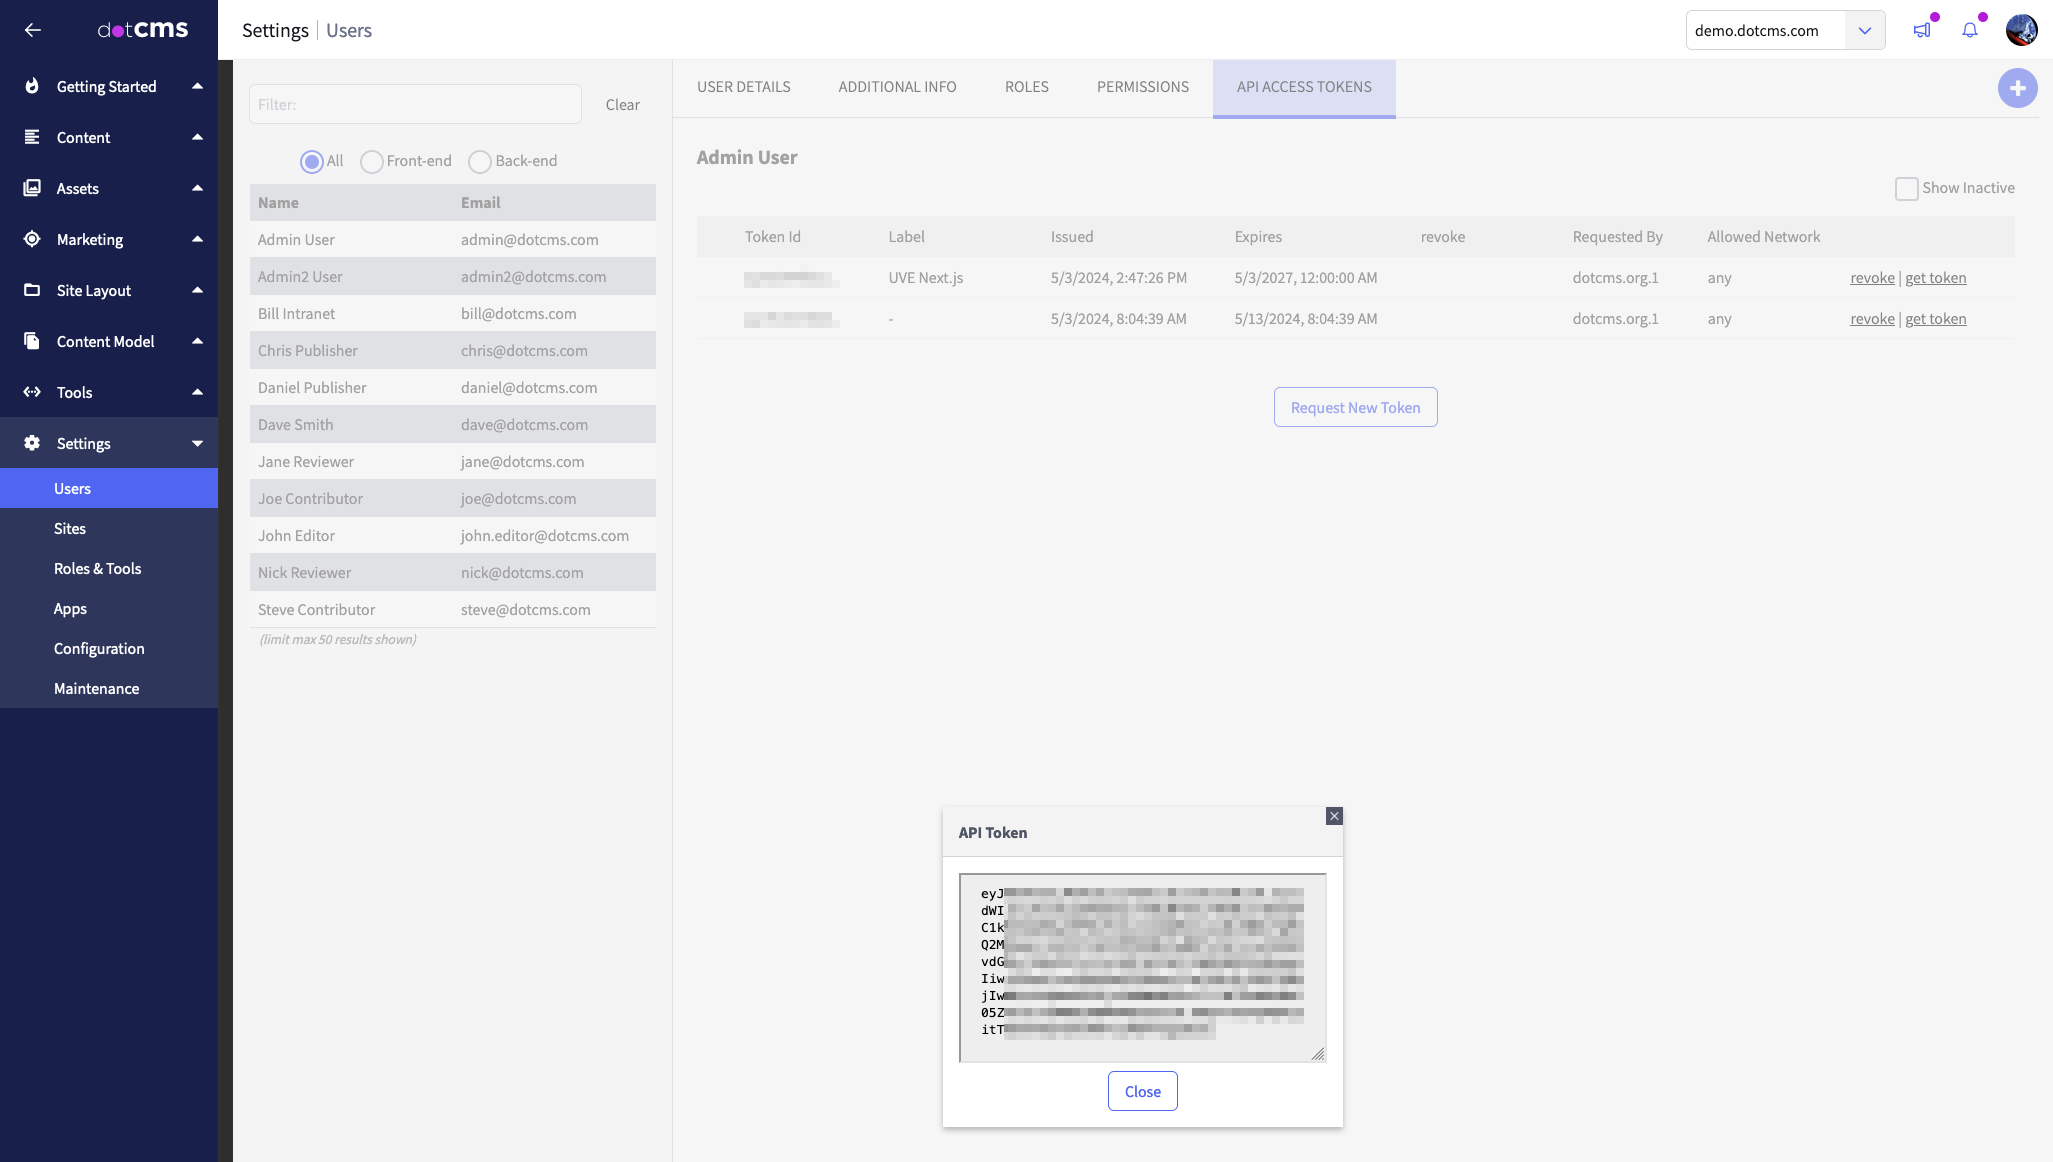
The API access token displayed as a JSON web token (JWT) in a modal in the dotCMS administrative interface.
: This is the URL for the dotCMS instance we created earlier. In our case, this isNEXT_PUBLIC_DOTCMS_HOST
.http://localhost:8082
Your
.env.localDOTCMS_AUTH_TOKENNEXT_PUBLIC_DOTCMS_HOST
The contents of the
.env.localAwesomesauce! We now have given the Next.js application the information it needs to consume the data it requires from dotCMS.
Run the dotCMS Next.js example locally
Now, we can run the dotCMS Next.js example locally to see it in our browser. The Next.js application uses
to acquire data from dotCMS and @dotcms/client
to render the Next.js pages and components. Navigate back to the root directory of your Next.js application (e.g. @dotcms/react
dotcms-uve-nextjsnpm run devYour terminal will output the following, and when you navigate to
http://localhost:3000npm run dev
The results of the
npm run devNote that the dotCMS Next.js example application (
localhost:3000localhost:8082Wonderful! Now, we’re ready to configure dotCMS to recognize the Next.js application and edit content within the Universal Visual Editor.
Edit dotCMS content in Universal Visual Editor
Now, we need to configure the Universal Visual Editor app (integration) within our local dotCMS instance for the Universal Visual Editor interface in dotCMS to recognize the Next.js application. Navigate to Settings > Apps and click on “UVE - Universal Visual Editor” in your local dotCMS instance:
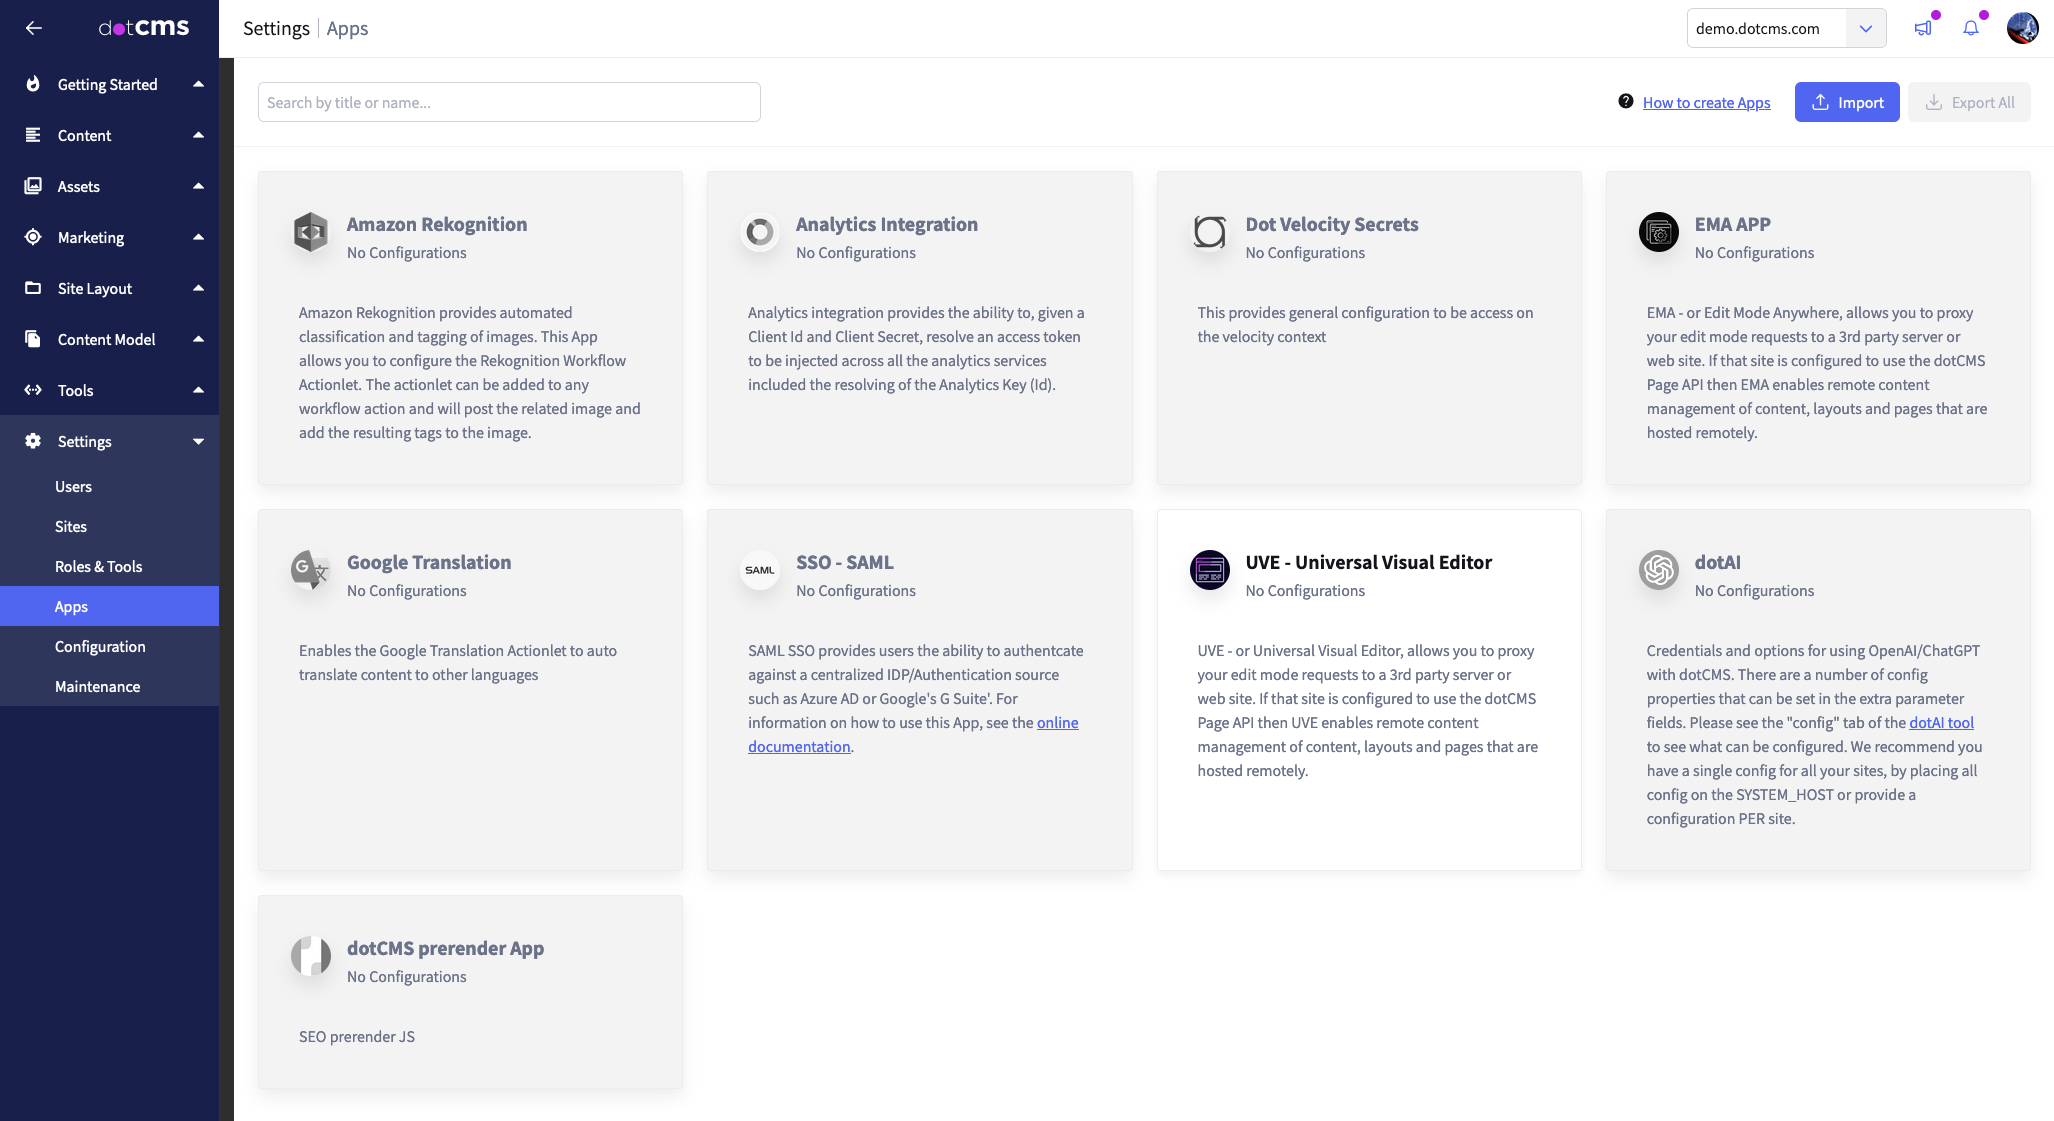
The “UVE - Universal Visual Editor” app in the Apps screen in the dotCMS administrative interface.
Then, click the plus button at the right of
demo.dotcms.comdocker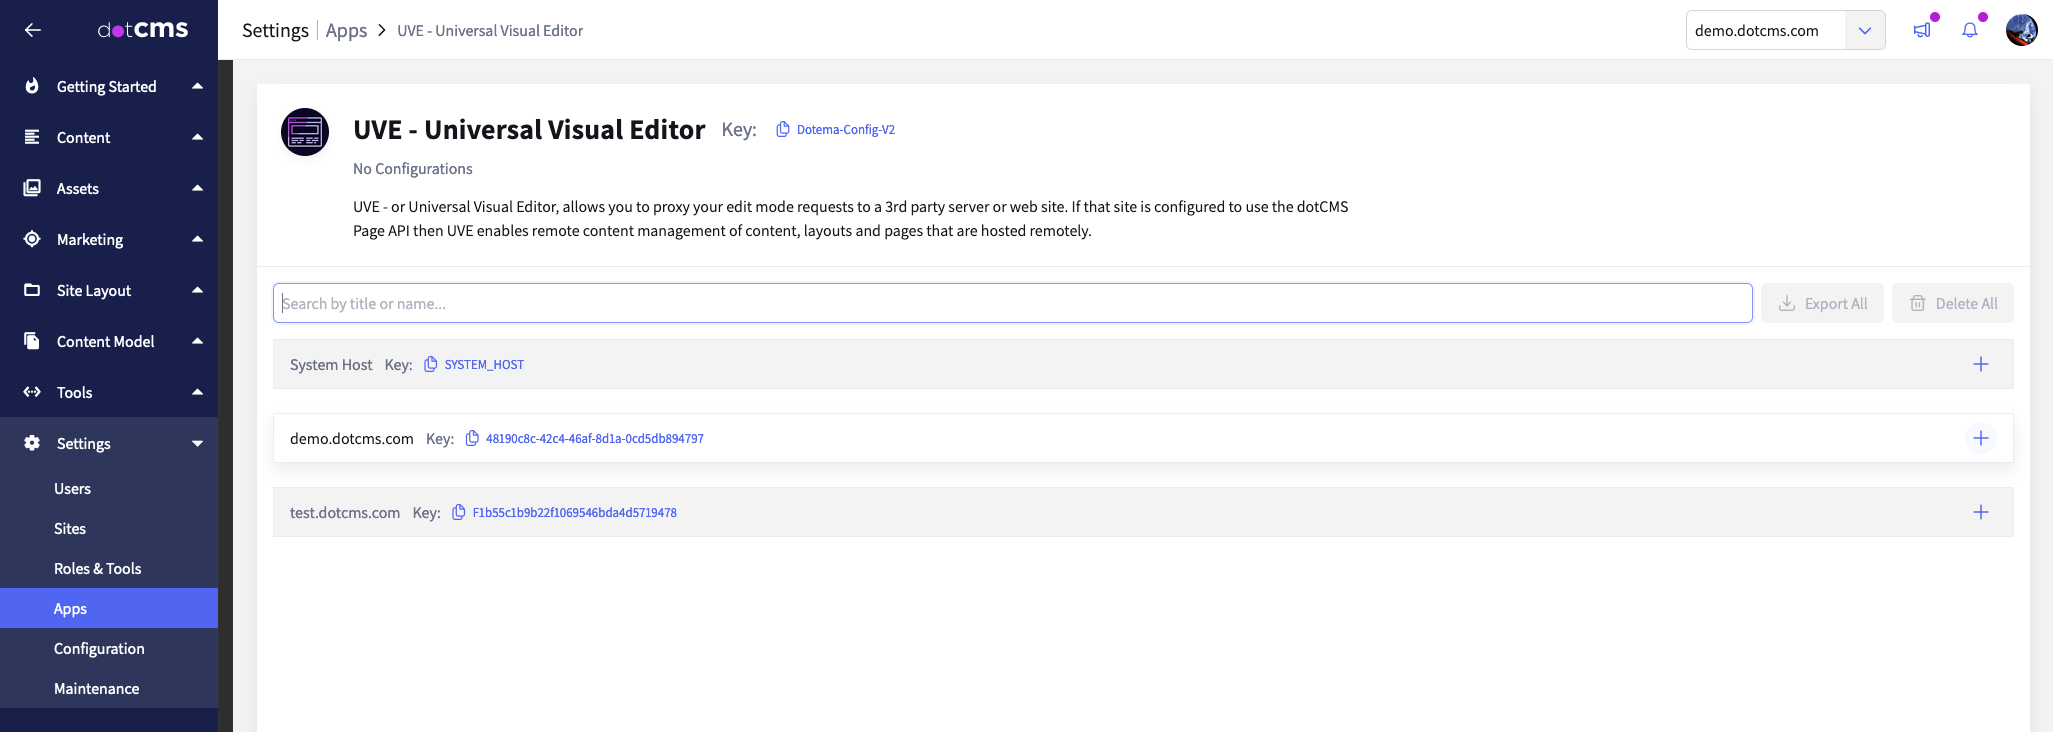
The “UVE - Universal Visual Editor” app configuration page in the dotCMS administrative interface.
In the Configuration field, add the following JSON object, which contains the URL for our Next.js application:
{ "config":
  [
    {
      "pattern": ".*",
      "url": "http://localhost:3000",
    }
  ]
}
In this object, the
patternurl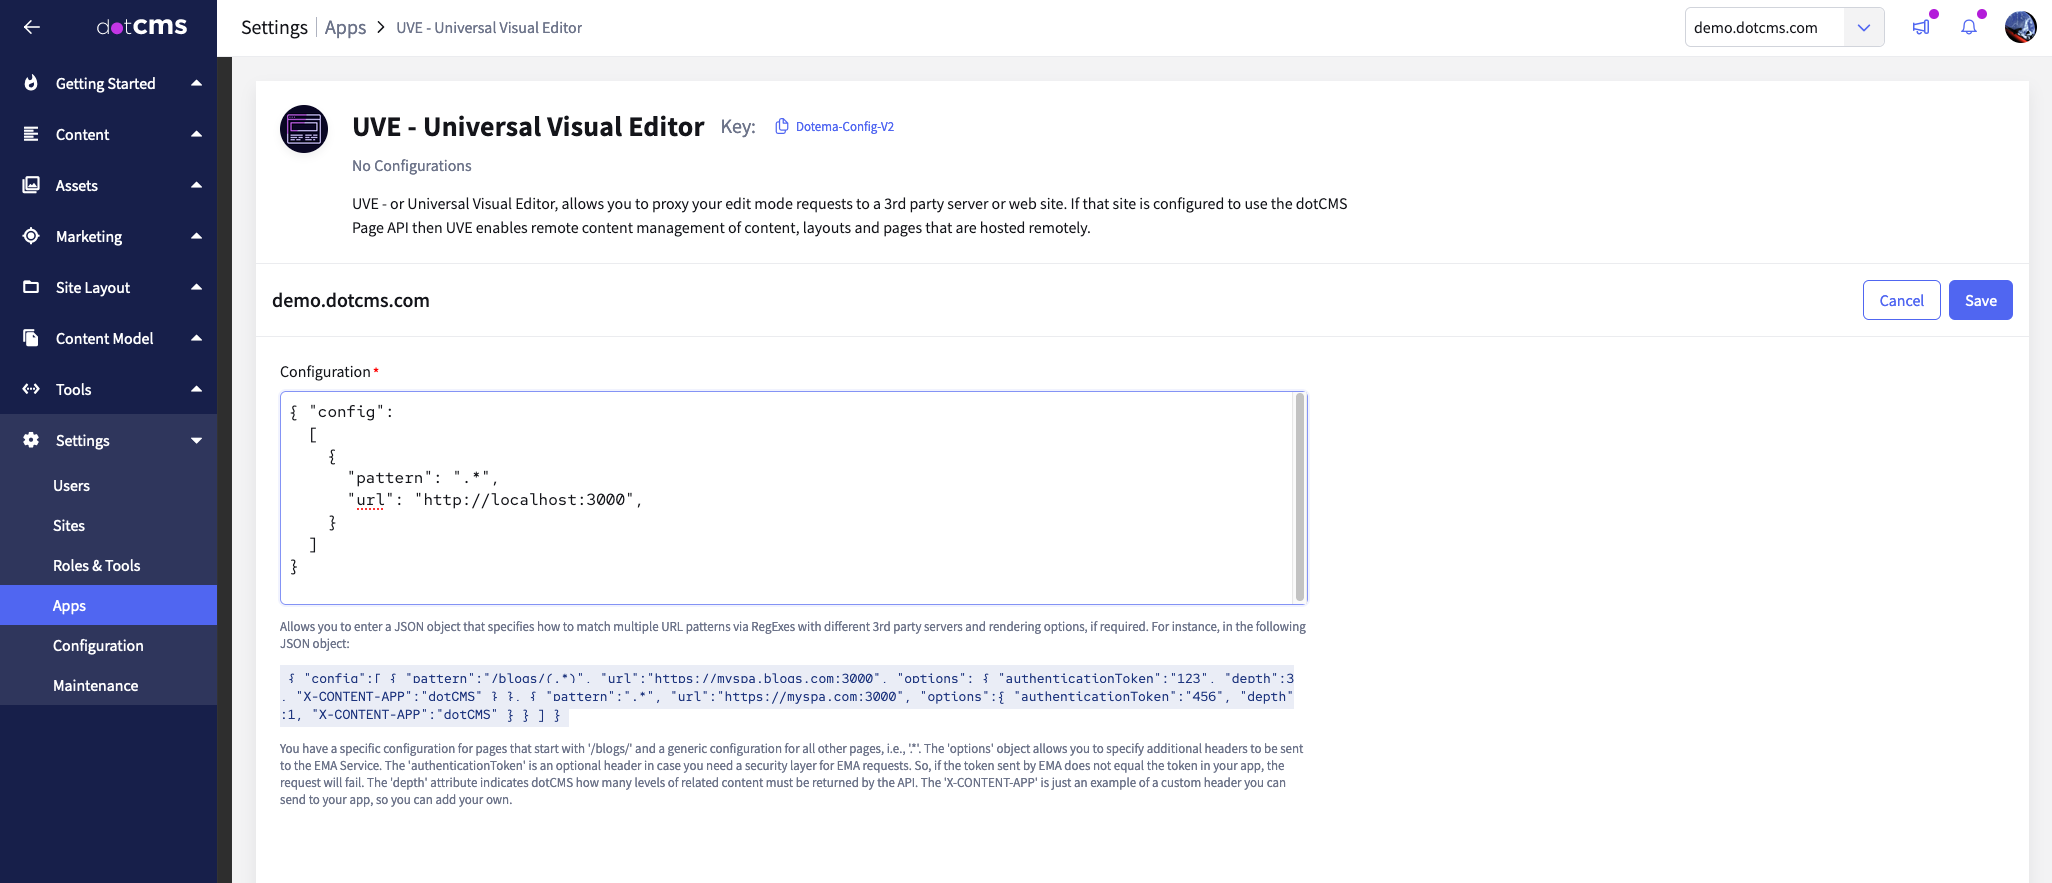
The JSON configuration object for our Next.js application as shown in the “UVE - Universal Visual Editor” app configuration in dotCMS’s administrative interface.
Now, click Save and navigate to Content > Pages. Let’s edit the “Home” page by clicking on “Home” in the content listing table.
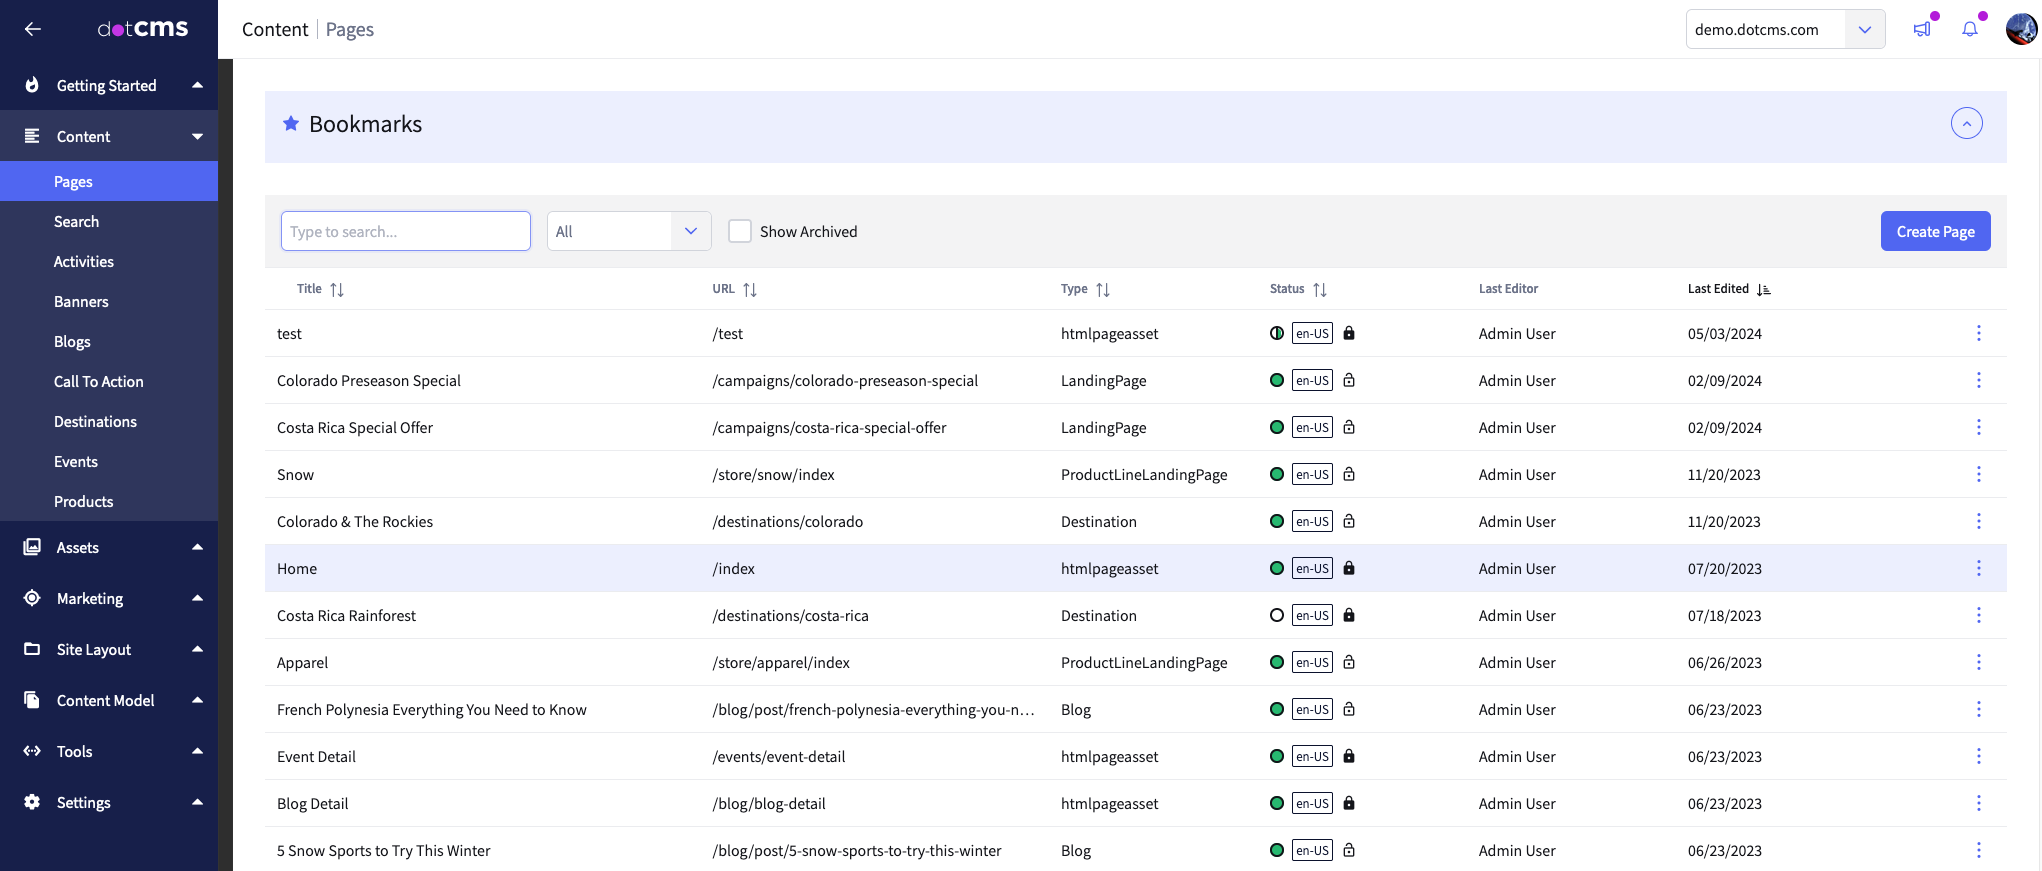
The content listing page in the dotCMS administrative interface, showing the “Home” content item highlighted.
Click on the pencil button while hovering over the hero component to edit the text contained therein:

The Universal Visual Editor is shown while editing the home page, displaying the Next.js application consuming the “Home” content item’s content.
Now, we can change some of the text in the header. Here, we’ve changed the “Explore the World” text to “Explore the Universal CMS.”
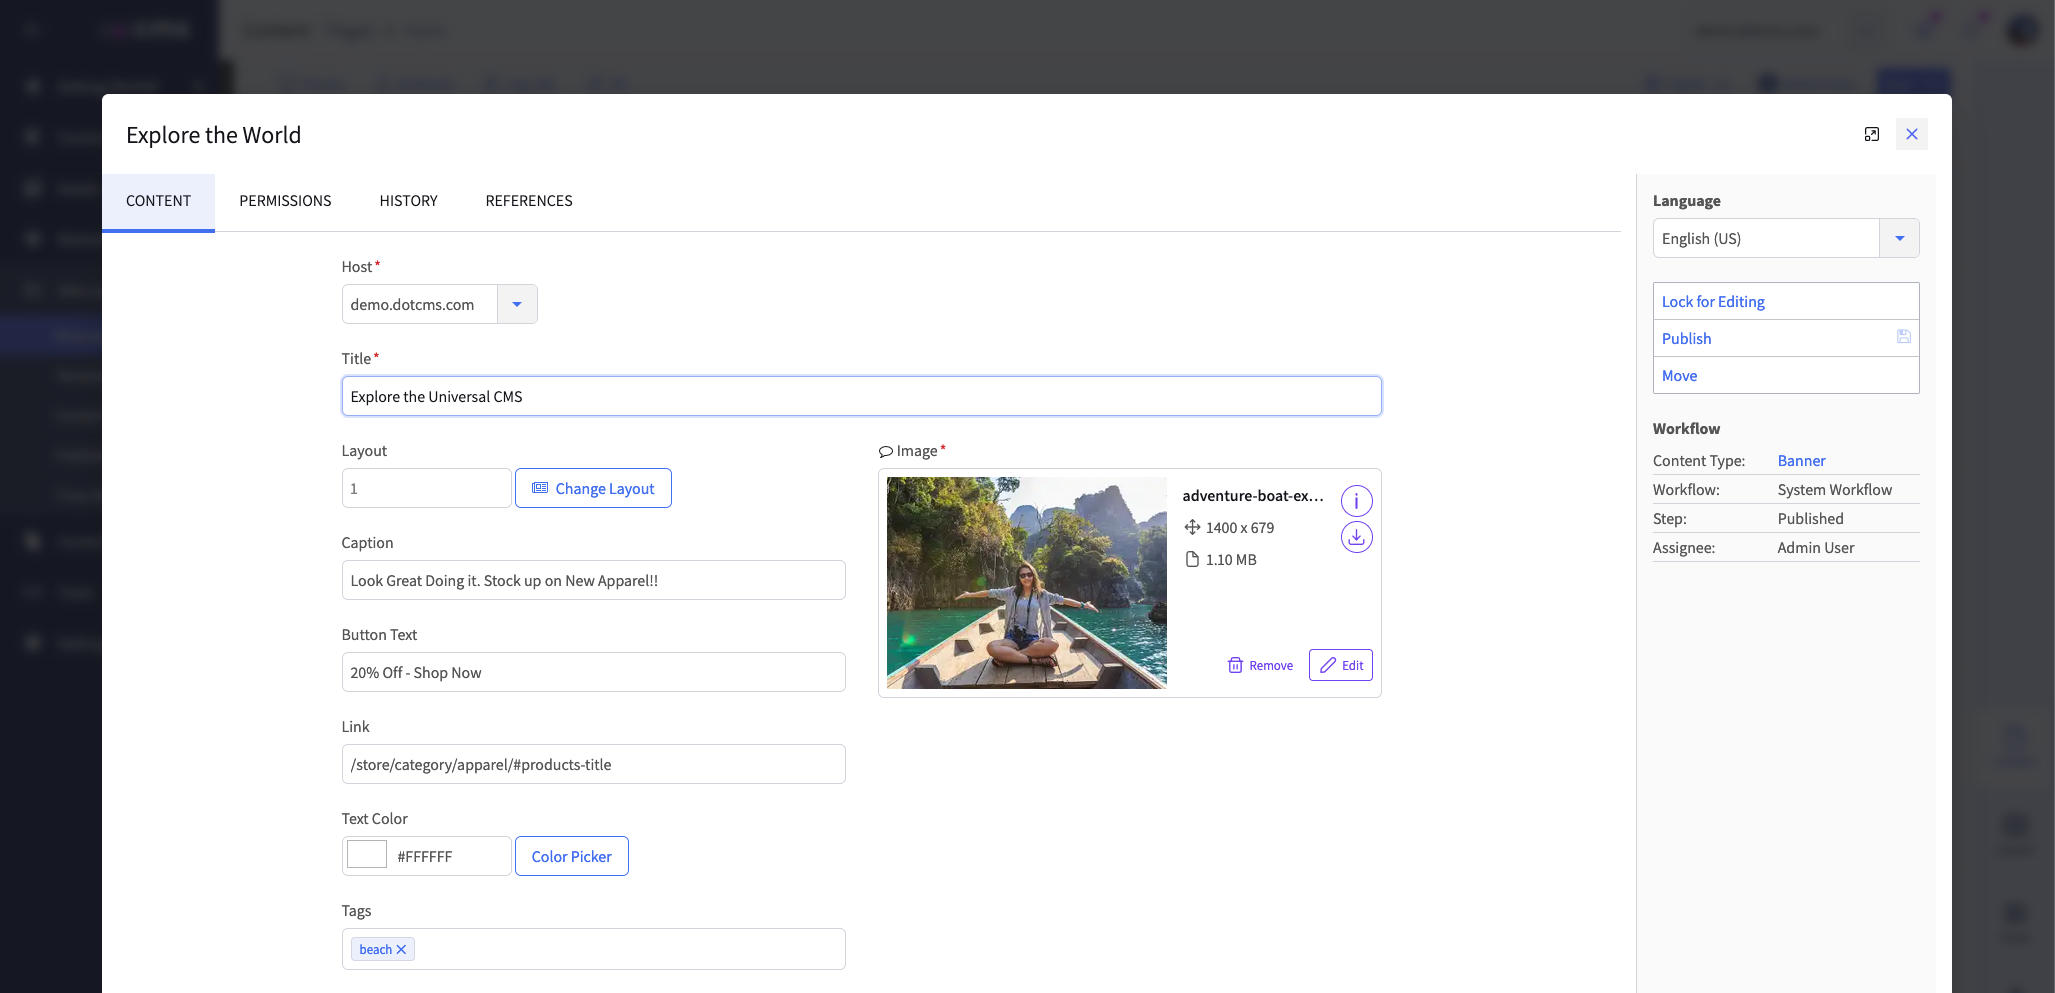
The edit modal for the header component of the “Home” content item, consumed by the Next.js application.
When you click Publish and exit the edit modal, you’ll see the updated text reflected in the Universal Visual Editor …

The updated header text as shown in the Next.js component within the Universal Visual Editor.
… and also updated on our local Next.js application at localhost:3000.
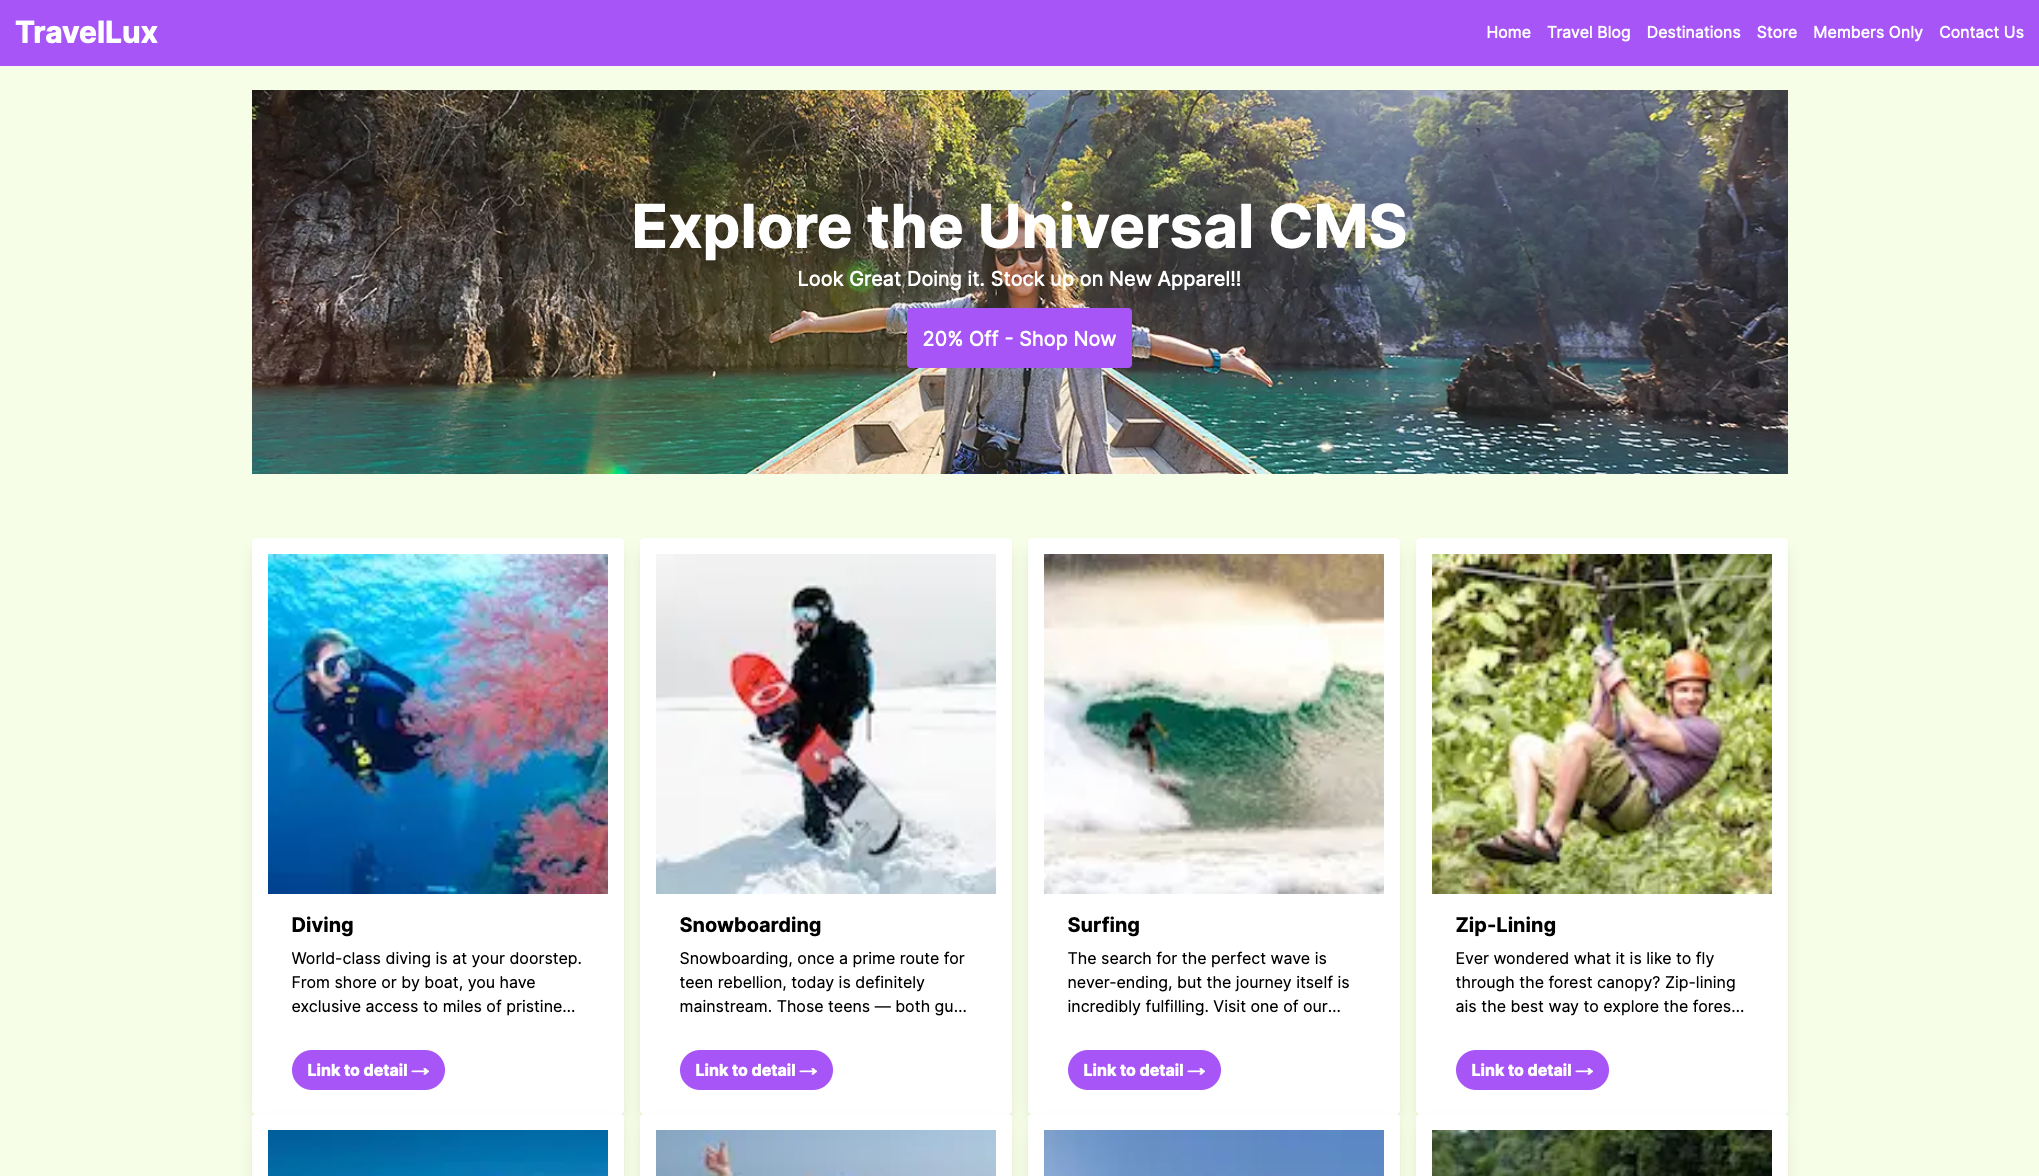
The updated Next.js application home page showing the edited text from dotCMS.
Sweet! You’ve now tried the dotCMS Universal Visual Editor with Next.js and its headless visual editing in less than fifteen minutes. Now, if you’re a developer, you can build to your heart’s content in Next.js, and if you’re a content editor, you can edit and visually manage Next.js-driven components to your heart’s content in the Universal Visual Editor.
Next steps and conclusion
The dotCMS Universal Visual Editor is an essential component of dotCMS’s vision for the next evolution of the CMS: the universal CMS. If you have more time, you can also reconfigure the JSON object located in the “UVE - Universal Visual Editor” app within your local dotCMS instance to delineate specific areas of the site that you wish to designate different editors for.
For example, if you have a single dotCMS instance serving content to a Vue.js storefront application (e.g. at
localhost:8000localhost:3000{ "config":
[
{
"pattern": "./storefront/*",
"url": "http://localhost:8000",
},
{
"pattern": "./blog/*",
"url": "http://localhost:3000",
},
]
}The universal CMS makes it possible to edit content and visually manage components in any JavaScript framework, whether it’s Next.js, Vue.js, or something else. There’s much more coming soon for the Universal Visual Editor. In the meantime, learn more about why the universal CMS is the future of content management.
Special thanks to Freddy Montes and Will Ezell for inspiring this article and for their feedback during the writing process.